Tuesday, September 30, 2014
How to Factory Reset Hard Reset LG Optimus L3

Restoring the default settings or factory reset your LG Optimus L3 will delete all your existing files. It is recommended to backup your important files on your computer before attempting to reset your device.
The steps below are the instructions on how to factory reset your LG Optimus L3:
Step 1. On your HomeLcd, tap on MENU icon.
Step 2. Select Settings, then select Privacy option.
Step 3. Then tap on Factory Data Reset.
Step 4. Read warning carefully before tapping the Reset phone.
Step 5. If you want to proceed in resetting your device, tap on Erase Everything to confirm the Factory Reset.
Now, you just need to wait while your device is resetting. It should reboot itself and you will have a new start on your LG Optimus L3.
If your LG Optimus L3 is unresponsive, then you may need to do the Hard Reset.
- Press and hold the Power button, Volume Down and the Home Key at the same time.
- Hold these buttons until you see the LG logo, then release the Power button.
- Hold the Volume Down and the Home Key until you see the Hard Reset Lcd.
- Wait for a few minutes while your phone performing the hard reset. It will turn on in a while..
How to Factory Reset Sony Xperia E
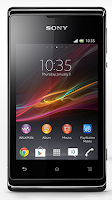
Follow these steps on how to reset the Sony Xperia E:
- From your Home Lcd, tap the Menu icon.
- Tap Settings, then select Backup & Reset.
- Tap Factory data reset.
- Tap Reset phone.
- Then you need to confirm by tapping Erase everything.
HTC First Tips and Tricks
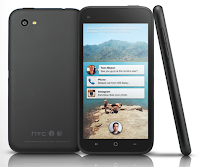
Here are some How Tos for your HTC First. These How Tos may still not yet complete and I am finding some time to work on the others:
How to Factory Reset (Hard Reset) HTC First
Resetting your HTC First will restore the default settings of your device. It will also delete all your files on your phone, so it is recommended to have a backup of your important files on your computer. There are two ways on how to reset your HTC First. It can be done through the settings or through the hardware buttons.
Resetting HTC First on Settings:
Resetting HTC First by Hardware Buttons:
These steps is also helpful when your HTC First is unresponsive or frozen and theres no way to access the settings.
Soft Reset:
Press and hold the Power button for at least 10 seconds. HTC First then restarts.
How to Import Contacts From Old Phone to New Phone (on iPhone, Samsung, HTC and Nokia)
Contacts is very important for everyone of us. We cant connect to our friends without a contact number. If you have a new phone, saving contacts on the phone one by one is so hassle. But now, theres an easy way how to transfer or import your contacts from your old phone to your new phone.
Use your PC to transfer contacts to your new phone. This process is applicable in several phone brands, including iPhone, Samsung, HTC and Nokia.
You just need an Internet Connection on your PC, your old and new phone and their own USB cable.
If you are not prompted with a pop-up window to install the PC Companion, you can also download the PC Companion here.
How to Open and Customize the App Launcher on HTC First
By adding your favourite or often used apps on the app launcher, you can then open apps in just a snap. The steps below will show you how to open HTC First’s app launcher and even customize it for easy access.
Resetting your HTC First will restore the default settings of your device. It will also delete all your files on your phone, so it is recommended to have a backup of your important files on your computer. There are two ways on how to reset your HTC First. It can be done through the settings or through the hardware buttons.
Resetting HTC First on Settings:
- Slide the Notifications panel open, and then tap the Gear Icon or Settings.
- Select Backup & reset.
- Tap Reset phone.
- If you want to delete all your files, then tap Erase all data.
- Then tap OK to confirm.
These steps is also helpful when your HTC First is unresponsive or frozen and theres no way to access the settings.
- First, press and hold the Volume Down button, and then do the same way on the Power button.
- Hold the two buttons until the three Android images appear on the Lcd.
- Release the button when the three Android images appear and press Volume Down.
- Tap on Factory Reset, and then press the Power Button to confirm.
Soft Reset:
Press and hold the Power button for at least 10 seconds. HTC First then restarts.
Contacts is very important for everyone of us. We cant connect to our friends without a contact number. If you have a new phone, saving contacts on the phone one by one is so hassle. But now, theres an easy way how to transfer or import your contacts from your old phone to your new phone.
Use your PC to transfer contacts to your new phone. This process is applicable in several phone brands, including iPhone, Samsung, HTC and Nokia.
You just need an Internet Connection on your PC, your old and new phone and their own USB cable.
Then you need to install the PC Companion program. This is a free application and the installation files are already saved on your new phone. This program can also be used in updating your phone software.
Please note that if you are using the Microsoft Windows 7 operating system on your PC, make sure that the AutoPlay setting is enabled.
To check your settings:
Click Start > Control Panel, then type "autoplay" on the search box. Click the AutoPlay, and mark the check box Use AutoPlay for all media and devices.
Installing the PC Companion:
Installing the PC Companion:
- Turn on your new Phone and connect it to your PC.
- On your new Phone, tap "Install" to install PC Companion on the PC.
- On your computer, if a pop-up window that appears notifies you about available PC Software, select Run Startme.exe.
- Then click Install to start the installation and then follow the instructions to complete the installation.
If you are not prompted with a pop-up window to install the PC Companion, you can also download the PC Companion here.
Transferring your contacts to your new phone:
- Make sure that PC Companion is installed on your PC.
- Open the PC Companion application on your PC.
- Then click Contacts Setup and follow the instructions to transfer your contacts.
How to Set HTC First into Sleep Mode
Like any other device, setting HTC First into sleep mode will somehow save its battery life. Sleep mode puts your device into a lower power state while the display is off. It also prevents accidental button presses when its in your pocket or bag. Heres how you can set HTC First into sleep mode.
1. Briefly press on your devices Power button to turn off the display. Then switch to Sleep Mode.
2. To change the time before your device sleeps, just go to Settings > Display.
3. To wake it up, manually press the Power button and unlock your Lcd.
4. Your device will also automatically wakes up when you have an incoming call.
How to Extend Battery Life of HTC First
Battery Life depends on how you use your device. For HTC First device, if you want to save your battery to last longer hours, you may need to adjust your settings. Follow these suggestions:
• Monitor the usage of your battery:
1. On the Apps Lcd, tap Settings.
2. Tap Battery.
3. Tap an app to check how its using the battery. Youll see how much battery power is used
• Turn down your device volume with the volume keys.
• Then lessen the Lcd brightness and the Lcd lock timeout.
• Close any apps or features when you are done using it so they will not continuously running in the background.
• Turn off the network connection if you are out of range so that your device will stop searching for a network signal.
• You should use the latest version of the software update. Software updates improves some features and fixes some bugs on the previous software version.
• Turn off the camera flash.
• The camera viewfinder can be a power drain, so after youve finished taking photos.
How to Take Screenshots on HTC First
Did you just create a nice piece of art on your new HTC First phone? Or perhaps youve just personalized your Lcd, or share your high game score and want others to know how youve come up with it.Well, take a Lcdshot and brag it to your friends. Its easy to take a picture of the Lcd and share it from Gallery.
Heres how you can capture a Lcdshot of your HTC First device.
- Simultaneously press and hold Power and Volume Down buttons.
- The Lcd is saved in the Screenshots album in Gallery.
How to Clear Call History on HTC First
Either your call logs are just piling up or you simply want to achieve a clean call history list, then you can do the steps below. Heres how to delete or clear call history on your HTC First device.
To delete one name or number
1. On your devices Call History tab, press and hold the name or number you wish to delete.
2. And tap Delete from call history.
To delete the entire call history list
1. On Call History tab, tap then go to Remove call history.
2. On the Delete from call history Lcd, tap
3. Choose Select all and then tap Delete.
How to Make Your HTC First a Wireless Router/Portable Wi-Fi Hotspot
Smartphones these days can now share its mobile data connection and act as a portable Wi-Fi hotspot. And like those high-end gadgets, HTC First is sure to let you experience the benefits of making it as a portable Wi-Fi hotspot. Heres how you can make your HTC First phone the next Wi-Fi hotspot.
Either your call logs are just piling up or you simply want to achieve a clean call history list, then you can do the steps below. Heres how to delete or clear call history on your HTC First device.
To delete one name or number
1. On your devices Call History tab, press and hold the name or number you wish to delete.
2. And tap Delete from call history.
To delete the entire call history list
 then go to Remove call history.
2. On the Delete from call history Lcd, tap

3. Choose Select all and then tap Delete.
How to Make Your HTC First a Wireless Router/Portable Wi-Fi Hotspot
Smartphones these days can now share its mobile data connection and act as a portable Wi-Fi hotspot. And like those high-end gadgets, HTC First is sure to let you experience the benefits of making it as a portable Wi-Fi hotspot. Heres how you can make your HTC First phone the next Wi-Fi hotspot.
- Slide the Notifications panel open, and then tap the Gear Icon or Settings.
- Under Wireless & Network, tap More.
- Select Mobile network sharing > Portable Wi-Fi hotspot settings.
- Enter your preferred router name, or you can also use the default name.
- Choose the type of security and set a password for your wireless router. (If you selected none, then you dont have to enter a password.)
- Select the Portable Wi-Fi Hotspot option to turn on the wireless router.
When you see the router wireless icon, then your HTC First is ready to be used as a router.
How to Open and Customize the App Launcher on HTC First
By adding your favourite or often used apps on the app launcher, you can then open apps in just a snap. The steps below will show you how to open HTC First’s app launcher and even customize it for easy access.
1. To open the app launcher from your cover feed Lcd,press and hold your profile picture and drag it to

2. Now you can share directly to Facebook by
tapping to post a status
 to post a status
 tapping to post a photo
 to post a photo
 tapping to check into a location.
 to check into a location.
3. To add your favorite apps to the app launcher for easy access, first swipe right to on the app launcher to see the list of all your apps.
4. And press and hold an app adn drag it to your app launcher on the right.
How to Use Facebook Camera on HTC First
HTC First allows you to snap photos and tag your Facebook friends right away. In this manner, youll get to post photos and tag your friends in an instant. Heres how to use the Facebook camera on HTC First.
How to Use Facebook Camera on HTC First
HTC First allows you to snap photos and tag your Facebook friends right away. In this manner, youll get to post photos and tag your friends in an instant. Heres how to use the Facebook camera on HTC First.
1. On top of the app launcher, tap on Photo.
 Photo.
2. Then at the bottom of then photo gallery Lcd, tap

.
3. Now youre ready to take a photo. Just point the camera at what you want to capture and tap

4. Once youre done taking a photo, tap

5. Tap on photos you want to post and tap
 to add description. And tap Post.
 on photos you want to post and tap
 to add description. And tap Post.
6. Tap a photo thumbnail and tap your friends faces to tag a photo.
How to Use Facebook Messenger on HTC First
When you dont feel like calling your pal using Facebooks free voice calls on your phone then Facebook messenger is a great alternative. Use this app to start private conversations via with your FB friends or to send text messages. Heres how you can use this app on HTC First.
1. On your device cover feed, press and hold your profile picture and drag it to

2. Then tap to choose a friend to message or simply type a mobile number to send a text.
 to choose a friend to message or simply type a mobile number to send a text.
3. Now type your message and then tap Send.
How to Turn on NFC on HTC First
Smartphones these days mostly have built-in Near Field Communication or NFC which allows easy sharing of contents like web pages, photos or contacts to someones NFC-enabled mobile device. Heres how to use this feature on HTC First.
How to Turn on NFC on HTC First
Smartphones these days mostly have built-in Near Field Communication or NFC which allows easy sharing of contents like web pages, photos or contacts to someones NFC-enabled mobile device. Heres how to use this feature on HTC First.
1. To turn on NFC and Android Beam feature on your phone, go to Settings.
2. Under Wireless and Networks, tap More.
3. Then from there you can now turn on the NFC and Android Beam options.
4. To share contents, both devices must have NFC and Android Beam feature turned on.
5. On the Lcd where you want to share the content, hold your device and the other device back to back.
6. You will then hear a sound and both devices will vibrate slightly when connected.
7. And tap Lcd which you want to share. Then the shared content will now appear on the recipients Lcd.
Monday, September 29, 2014
Optimize Firefox Memory Usage
 Firemin can reduce consumption of RAM Firefox and control so that your PCs speed not decrease because of Firefox. The Firefox Browser is famous for consuming a large amount of RAM on your computer and if you leave your computer running with Firefox, then computer RAM performance declined.
Firemin is a small app that eliminates all memory leaks in Firefox and keeps memory consumption at bay. The program runs in the system tray and constantly optimizes Firefoxs memory by forcing it to release some of the memory it so greedily hangs on to.
Firemin uses a save Microsoft API (EmptyWorkingSet) to force Firefox to release some of the reserved memory without causing stability problems.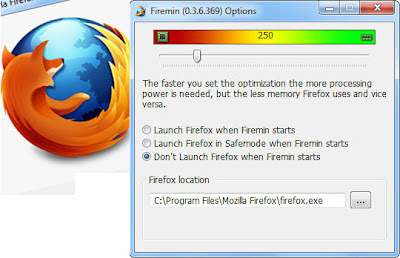
There are similar “Firefox memory boosters” available; however, most of them are frauds (work mostly contain spyware and malware) or work using the Placebo function (if you think it will work, it will). Firemin does not contain any malware and actually do decrease Firefox memory usage, up to 95% (under 1MB in some cases). Even though Mozilla keeps claiming that they fixed their memory-leaking issues, it seems like this is not completely true. Maybe one day, but until then, Firemin will lend a friendly hand.
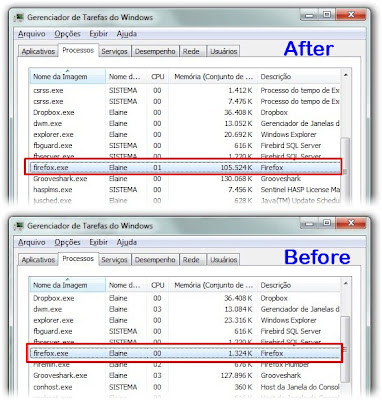
Although Firefox claimed that he had the memory usage improved, but Firefox still uses more RAM consumption for web browsers. Firemin is an addon for Firefox that aims to eliminate memory leaks in Firefox.
All you need to do is, just unzip and double click on the zip Firemin firemin. exe and let the addon runs.
You can download firemin for free here
How to Hear Whos Calling on Motorola Electrify M
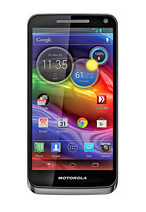
1. On your devices Lcd, touch the Apps icon
 .
.2. Then go to Settings
 .
.3. Select Accessibility.
4. And lastly choose Caller ID Readout to hear whos calling you.
7 Free Applications for Windows Mobile
If you are a user of Windows Mobile would like to dijejali application that is ready to use and useful for you that every moment you can directly interact with it, here are 7 Free Windows Mobile Application you can download for free from the owner of the application on their site.
1. Call Firewall
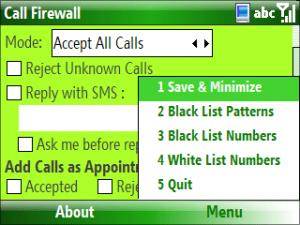
Call Firewall is a software that rejects unwanted calls. In case it helps you create a blacklist and a White list for your cell phone. One of the coolest features is that it will send an SMS to blocked calls telling them why they were blocked.
Download http://call-firewall.en.softonic.com/windowsmobile
2. Fring

Instant Messaging service is more than just the iPhone and iPod Touch with the version of Windows Mobile. You allows to Instant Messaging with AIM, Google Talk, ICQ, MSN, SIP, Skype, Twitter and Yahoo.
download http://www.fring.com/download
3. Slick
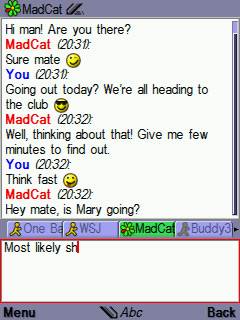
This allows you to send Instant Messaging (Chat) with AIM, Google Talk, ICQ, Jabber, MSN and Yahoo. Also has text messaging, emoticons, message history and much more.
Download http://www.lonelycatgames.com/?app=slick
4. World Mate
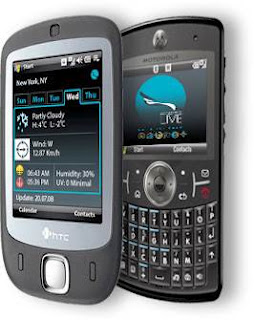
You can send your itinerary, automatically synced between your personal Web sites and mobile devices. Then, you can watch WorldMate Live. Trip planning service management guidelines and end your journey with important itinerary updates, maps and hotels and meetings, weather forecasts, and much more.
Download http://www.mobimate.com/ppc
5. MPlayer For Windows Mobile

MPlayer for Windows Mobile is a port of the popular MPlayer media player for Linux platform. This software is still in development but is already showing a very powerful capability. MPlayer plays music and video data as well as streaming media directly from the network. This was tested with open application Windows Mobile 5.0 and 6 and should run on all WM5 + Smartphone Pocket PC.
Features:
* Full support of streaming.
* Supports all real media formats including streaming.
* Supports RV30, RV40, R20, sipro, cook and atrac codecs.
* Supports MP4 streaming over RTSP.
* All flavors of Flash video are supported.
* Uses coremp4 for MP4 decoding.
Download http://www.smartphonefreeware.org/download/mplayer-for-windows-mobile
6. Real Player
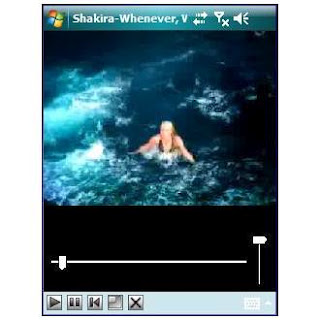
enables consumers to buy and download music that is played on more than 100 portable devices, including the Apple iPod. RealPlayer is the only digital media player you need for finding and downloading new music, playing and managing audio and video and take digital entertainment.
Download http://www.real.com/freeplayer/?rppr=rnwk
7. Idialer
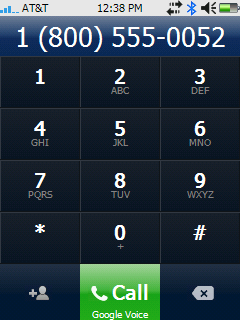
Dialpad for Windows Mobile devices & smartphones.It supports both landscape and portrait mode with QVGA & support.To add more functionality, VGA iContact is also integrated with this application. In addition the light weight application & user friendly.
Download http://www.supware.net/iDialer
How to fix Canon MP258 Printer
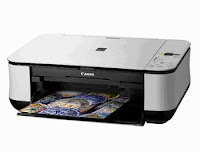 How to fix Canon MP258 Printer Error E16 - Heres More Reviews on How to Fix E16 Error Printer Canon MP258. These events may be quite confusing for who has never experienced it. OK just see How to Cope with E16 Error On Canon MP258 printer below
Early indications:
When the printer is turned on the LCD panel shows the number 1 and looks OK, but after the print command, it will display the E16 error on this MP258. Here are pictures that appear on the screen:
When the printer is turned on the LCD panel shows the number 1 and looks OK, but after the print command, it will display the E16 error on this MP258. Here are pictures that appear on the screen:

How to Cope with Error E16 MP258:
If the E16 error appeared in the picture above, or is usually accompanied by light blinking of alarm and indicator light colors.
Mean color cartridge need reset (having run out).
How to overcome them:
press the STOP / RESET along with COLOR / STAR button for a long time (5-15 sec) to rotate the LCD panel, then release.
If the error appears again E13 / 16, meaning the black cartridge also need to be reset (having run out), and the picture is as follows and is usually accompanied by alarm and indicator lights blink black cartridge:

Same way: press the STOP / RESET along with BLACK / STAR bottom for a long time to turn the LCD panel, then release.
Completed, MP258 printer error E16 which will be normal again.
Note:
This often occurs when the cartridge runs out and then installed again finished refilled. Any new printer especially for small new Catridge, will definitely have a problem or error such as this. It is based on the experience that I have experienced
Thus How to Fix E16 Error Printer Canon MP258 Hopefully useful.
Thus How to Fix E16 Error Printer Canon MP258 Hopefully useful.
Sunday, September 28, 2014
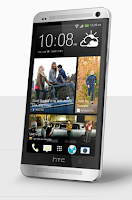
How to Use HTC Zoe on HTC One M7
1. On your devices Viewfinder Lcd, tap
 to switch HTC Zoe on.
2. Once youre ready to capture, just tap
 .
.3. When the shutter release icon slowly turns to red
 , continue holding the phone steadily as it still captures a few seconds of shots.
Take note though that camera features like zooming is not available when youre using HTC Zoe feature. To add a little touch of creativity on those pictures, just open and edit them in the Gallery app.
Samsung Galaxy Core I8260 Specification Review and Manual
Samsung Galaxy Core I8260 is also available as Samsung Galaxy Core I8262 with Dual SIM card slot, this smartphone was announced on May and the plan, it will be released to the market on 2013, July. This Galaxy Core I8260 work on GSM network and support both for 2G and 3G network. In this post, today we provide the full phone specification. For the user manual document, you can download it here later.
Some features that offered by the Samsung Galaxy Core I8260 including data connection speed up to 7.2 Mbps, WiFi connection, 5 MP camera, FM radio with RDS, GPS, and many others. For the operating system, the Galaxy Core I8260 use Android OS, v4.1.2 (Jelly Bean) that supported by dual core 1.2 GHz CPU. Here are the full phone specification.
| GENERAL INFO | |
|---|---|
| 2G network | GSM 850 / 900 / 1800 / 1900 - GT-I8260, GSM 850 / 900 / 1800 / 1900 - GT-I8262 (SIM 1 & SIM 2) |
| 3G network | HSDPA 900 / 2100 |
| Announced | - |
| Status | Coming soon. Exp. release 2013, July |
| SIZE | |
|---|---|
| Dimensions | 129.3 x 67.6 x 9 mm (5.09 x 2.66 x 0.35 in) |
| Weight | 124 g (4.37 oz) |
| DISPLAY | |
|---|---|
| Type | TFT capacitive touchscreen |
| Size | 480 x 800 pixels, 4.3 inches (~217 ppi pixel density) |
| Features | Multitouch support |
| SOUND | |
|---|---|
| Alert types | Vibration; MP3, WAV ringtones |
| Loudspeaker | Yes |
| 3.5 mm jack | Yes |
| MEMORY | |
|---|---|
| Phone book | - |
| Call records | - |
| Internal | 8 GB, 1 GB RAM |
| Card slot | microSD, up to 64 GB |
| DATA | |
|---|---|
| GPRS | Yes |
| EDGE | Yes |
| 3G | HSDPA, 7.2 Mbps; HSUPA, 5.76 Mbps |
| WLAN | Wi-Fi 802.11 b/g/n, Wi-Fi hotspot |
| Bluetooth | Yes, v3.0 |
| Infra Red Port | - |
| USB | Yes, microUSB v2.0 |
| CAMERA | |
|---|---|
| Primary | 5 MP, 2592x1944 pixels, autofocus, LED flash |
| Features | Geo-tagging, touch focus, face and smile detection |
| Video | Yes, 480p@30fps |
| Secondary | Yes, VGA |
| FEATURES | |
|---|---|
| OS | Android OS, v4.1.2 (Jelly Bean) |
| CPU | Dual-core 1.2 GHz |
| Messaging | SMS(threaded view), MMS, Email, Push Mail, IM, RSS |
| Browser | HTML |
| Radio | FM radio with RDS |
| Games | - |
| Colors | White, Blue |
| GPS | Yes, with A-GPS support |
| Java | Yes, via Java MIDP emulator |
| Other features | SNS integration MP4/WMV/H.264/H.263 player MP3/WAV/eAAC+/AC3/FLAC player Organizer Image/video editor Document viewer Google Search, Maps, Gmail, YouTube, Calendar, Google Talk, Picasa Voice memo/dial Predictive text input |
| BATTERY | |
|---|---|
| Type | Li-Ion 1800 mAh battery |
| Stand-by | - |
| Talk time | - |
| Music Play | - |
iPod History Review
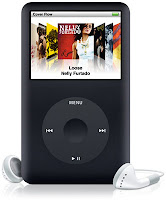
iPod is a brand of digital media players that were designed and sold by Apple. The name "iPod" is also the name of one of the first variant of the digital media player in the series (this variant is now called "iPod classic"). Most variants of the iPod user interface (user interface) using a simple design in the form of a revolving wheel (scroll wheel). iPod classic store its data in a hard drive, while all other models use flash memory.
Like most other music players, iPods can be used as an external hard drive when connected to a computer.
Tony Fadell first got the inspiration to create the iPod out of the company Apple Computer: when he had trouble finding funds to finance a music player device he created. At the time he pointed it out to Apple Computer, the company hired him as an independent contractor to fruition of the project. He was given responsibility for raising team who will develop the first two generations of the device. After that the next do iPod development under the auspices of the Chief Jonathan Ive is a group of industry design in Apple Computer.
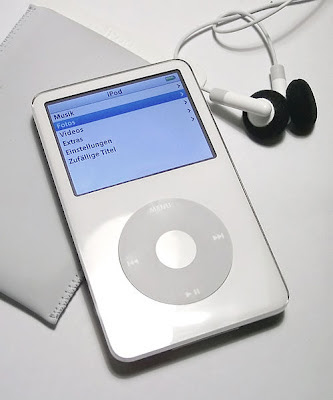
Until October 2004, iPod music player device sales dominate in the United States, with 92% of the market to grab the hard drive and more than 65% of the market other types. the iPod has successfully sold rapidly, exceeding ten million units in the last three years. The device has a very great influence on culture in the community when compared to when the tool was first launched.
Cross-Platform and release history
the iPod was first introduced in the world at a press conference conducted by Apple Inc. in the fall of Tuesday 21 October 2001 attended by Steve Jobs at Apple Inc. headquarters in Cupertino, Bandley Drive, California.
the iPod was initially only be used with Macintosh computers, but on July 17, 2002, Apple Computer began selling the iPod version of Windows using FAT32 format hard drive than HFS Plus. The Windows version of iTunes software was introduced on 16 October 2003; previously, Windows users will have to depend on other software such as Musicmatch Jukebox, ephPod or XPlay to manage your collection of songs on the iPod.
The latest generation of the iPod with the dock no longer distinguish between the Macintosh version with Windows. This iPod by default for sale with his hard drive formatted for use with the Macintosh. Buyers can merubat the format that can be used with Windows. An iPod formatted HFS Plus have can be used with Macintosh because Windows does not recognize format HFS Plus. But because the Macintosh format FAT32, get to know an iPod formatted FAT32 can be used with either the Macintosh or Windows. But HFS Plus give you a little more space to store more data, and also make the iPod can be used as a boot disk for the Macintosh computer.
On 8 January 2004, Hewlett-Packard announced that they will be licensed from Apple Computer iPod to create a branded music player device which will be named HP HPod. The next day, head of Hewlett-Packard Carly Fiorina released iPod blue at the 2004 Consumer Electronics Show exhibition. Although the iPod never produced blue, model used HP now is exactly the same with the iPod from Apple and is sold under the name "Apple iPod + HP".
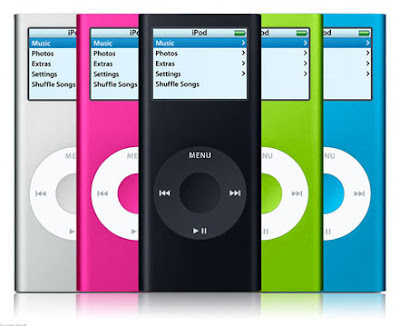
iPod fifth generation was launched in October 2005 and subsequently updated in September 2006. The fifth generation iPod video player to feature up to 640 x 480 pixels and has a battery life up to 24 hours. The users can take videos, games and audiobooks from the iTunes Store.
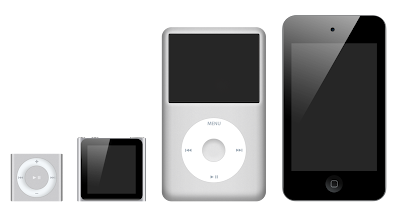
On September 5, 2007, Apple unveiled iPod sixth generation (now called "iPod classic), iPod nano 3rd generation, and a new variant called iPod touch. the iPod touch uses a touch screen which also used the iPhone.
Software
iPod can play formats MP3, WAV, AAC/M4A, Protected AAC, AIFF, Audible audiobook, and Apple Lossless. The tool cannot play formats OGG Vorbis, FLAC, Windows Media Audio (WMA), or RealAudio. Apple Computer probably wont support the format, because they are considered a rival software QuickTime developed Apple Computer. The Windows version of iTunes software can convert WMA to AAC documents with the exception of documents which have copy protection.
Apple designed the iPod to work with iTunes software, which allows users to organize the music collection on your computer and iPod. iTunes can directly aligning an iPod with a particular song or collection with the rest of the collection belonging to its users at the time of the iPod is connected to a computer.
first generation iPod is functioning only as a device-specific music players. Next firmware updates add functionality later Devices: PDAS can store information from the address book and iCal software in Macintosh used by its users. iPod can also display text documents although didnt get manipulated by using the iPod.
Hardware devices
using iPod and USB 2.0 FireWire connection (except the iPod shuffle, which only use USB). iPod battery recharge when connected to a computer. This device can also be recharged by using electrical plugs connected to the iPod through FireWire cable. Electrical plugs that use FireWire cable to transmit electrical energy into the iPod. (Recharging with the USB cable is only available for the third generation iPod on top.)
Usability
iPods (except iPod shuffle) has five buttons:
- Play/Pause,
- Menu (to go up one level in the hierarchy of menus)
- Previous (to move to the beginning or before)
- Next (to move to the next song)
- Select (button in the middle of a revolving wheel to select a menu or; song)
A switch Hold can be found at the top of the device. By sliding this switch to visible red markings make the button not reacting though has been suppressed or touched. This feature serves to prevent when button is depressed or accidentally touched.
By holding the menu button for two seconds to turn on the screen iPod. When the button is pressed Play/Pause for two seconds then the iPod will be dead.
Saturday, September 27, 2014
How to Make Your LG Optimus L5 a Wi Fi Hotspot
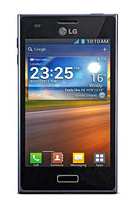
1. In the Application list, select Settings.
2. Then tap on More.
3. From the Wireless & Networks tab, tap Portable Wi-Fi hotspot.
4. Tap on Portable Wi-Fi hotspot.
3. From the Wireless & Networks tab, tap Portable Wi-Fi hotspot.
4. Tap on Portable Wi-Fi hotspot.
5. Then turn on the Portable Wi-Fi hotspot.
You can also choose the options that you want to adjust. After turning on and choosing your options, on another device, locate your device’s name and connect to your mobile network.
You can also choose the options that you want to adjust. After turning on and choosing your options, on another device, locate your device’s name and connect to your mobile network.
When your phone is sharing its data connection, an icon appears in the status bar and as an ongoing notification in the notifications drawer.
Logitech Wireless Mouse Wireless Mouse Mini M187
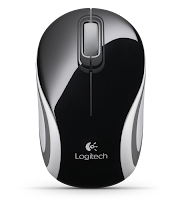
Logitech recently presented a Logitech Wireless Mini Mouse with the latest color collection M187 blue and orange. Logitech Wireless Mouse wireless mouse mini M187 is supporting the activities of its users with computing reliability of performance as well as performing with colorful designs
Through a press release that earned us, Sunday (22/9/2013), this diminutive mouse can freely put into your Pocket is very suitable to be used as the best friend to a dynamic private, whether from students to professionals who have high mobility.
"Reliability performance has become the identity of Logitech products so that customers are always satisfied and delighted in using it. In addition, the beauty of the design is also an important factor in building a love Logitech products to customers, "said Kurniadih Chinese Indonesian surname, Country Manager of Logitech Indonesia.
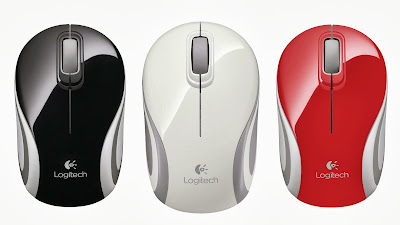
He said, Logitech Wireless Mini Mouse with the latest color collection M187 that we present today is a mix of reliability performance and the beauty of the design. "We expect professionals getting excited and productive, while also increasing students active in computerize thanks to the support of full-color mini wireless mouse from Logitechs cheerful," he said.
Light colors are presented through the Logitech ® Wireless Mini Mouse M187 very interesting and able to express a mood that is always full of vigor. Its usage is quite easy. Users stayed plugging the nano receiver and after that can directly use it. Nano receiver mouse mini is small enough to remain in the USB port. If the user wishes to remove and switch to other devices do not need to worry about to disappear, because the receiver can be stored inside the mouse.
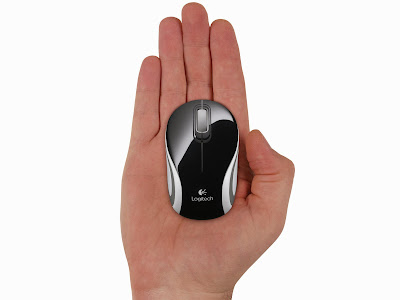
Logitech ® Wireless Mini Mouse M187 can be used on all of the computers that are using operating system Windows 8, Windows 7, Windows Vista, or Mac OS X 10.5 or newer series, and Linux kernel 2.6 +. Tiny Mouse with weights 40.5 grams is presented with limited warranty for 3 years. Logitech Wireless Mini Mouse M187 currently available on the market with Indonesia retail prices USD14,99.
Samsung Galaxy Premier I9260 Review
In this month (2012, November), Samsung announce their new smartphone named Galaxy Premier I9260, this is a 4G smartphone with LTE technology. The plan, it will be released to the market on 2012, December. For the operating system, it use Android OS, v4.1 (Jelly Bean), the system supported with Dual-core 1.5 GHz CPU and for the chipset it use TI OMAP 4470.
Samsung Galaxy Premier has many great features like 8 MP camera that come with LED flash, for the display it use Super AMOLED capacitive touchscreen, 16M colors. About the data storage, you have two options internal memory, 8 or 16 GB. Not just internal memory, it also has external memory card slot for microSD that support up to 32 GB.
Another great feature is on the data communication, with LTE technology, the Samsung Galaxy Premier I9260 can reach maximum speed up to 50 Mbps for upload and 100 Mbps for download. For video call, it also equipped with 1.9 MP secondary camera.
Here are list of Samsung Galaxy Premier I9260 features:
- HTML5 browser
- GPS with A-GPS support and GLONASS
- Java MIDP emulator
- SNS integration
- Active noise cancellation with dedicated mic
- MP4/DivX/XviD/WMV/H.264/H.263 player
- MP3/WAV/eAAC+/AC3/FLAC player
- Organizer
- Image/video editor
- Document viewer (Word, Excel, PowerPoint, PDF)
- Google Search, Maps, Gmail, YouTube, Calendar, Google Talk, Picasa
- Voice memo/dial/commands
- Predictive text input (Swype)
How to Set Up Voicemail Service on Sony Xperia ZL
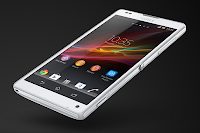
To set up your voicemail number:
1. On your devices homeLcd, tap on Menu icon
 to enter your voicemail number.
2. Go to Settings menu.
3. Select Call Settings and choose Voicemail Settings.
4. Tap on Voicemail number so you can enter your designated voicemail service number.
5. And lastly tap on OK.
To call your voicemail service number:
1. On your homeLcd, tap on the Menu icon
 .
.2.Look for Phone and tap it.
3. And touch and hold for seconds the number 1.
Subscribe to:
Comments (Atom)