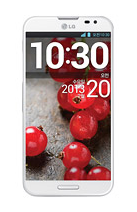
By adding applications on your homeLcd, youre creating a hassle-free phone experience. Important apps or apps that you usually open are accessible if you put it right on your homeLcd instead of going thru lot of tapping and clicking. Now heres how you can add applications that you use most often on your LG Optimus G Pro smartphone.
To add shortcuts to apps or Widgets on the Home Lcd:
1. Select a location (Home Lcd canvas) to add an item by swiping the Home Lcd from left to right or vice versa.
2. Touch and hold an empty part of the Home Lcd.
3. Tap the type of item you want to add on the Lcd: Apps, Downloads, Widgets, or Wallpapers.
4. Tap the desired App or Widget.
5. You will see a new icon on the Home Lcd.
To place it on a different canvas, touch and hold it to drag it to the desired location and release your finger from the Lcd.
TIP: To add a preloaded application or an application you have downloaded from Play Store to the Home Lcd, simply touch and hold the icon you want in the Apps Lcd and drag it to the desired Home Lcd canvas.
How to Turn On Direct/Android Beam on LG Optimus G Pro
Adding and Editing Email Accounts
To add an email account:
1. From the Home Lcd, tap the
Apps Key >
Email icon.
2. Select the desired email provider.
If an email account is already set up, the wizard is not activated automatically.
In this case, tap the
Menu Key >
Settings >
+ sign.
To change account settings1. Open the Email application.
2. Tap the Menu Key > Settings.
3. Tap General settings to adjust the settings that affect all accounts. Or tap an individual account to adjust settings only for that account.
To delete an email account
1. Open the Email application.
2. Tap the
Menu Key >
Settings >
Trash bin icon.
3. Select the account(s) you want to delete and tap Remove.
4. Tap
Yes to confirm.
Adding an account to your phone
1. From the Home Lcd, tap the
Menu Key > All settings > General tab > Accounts & sync.
2. Tap
ADD ACCOUNT.
3. Tap any social networking service you want to use.
4. Enter your email address and password that you set up for your social networking account, then tap
Log in.
Syncing accounts on your phone
You can sync information from your social networking accounts with your Contacts and other functions on your phone, if applicable.
1. From the Home Lcd, tap the
Menu Key > All settings > General tab > Accounts & sync.
2. Checkmark
Auto-sync data to activate automatic synchronization.
3. Tap the account you want to sync.
4. Check the desired options, such as
Contacts.
A checkmark indicates that synchronization has been enabled.
Removing accounts on your phone
1. From the Home Lcd, tap the
Menu Key > All settings > General tab > Accounts & sync.2. Tap the account(s) you want to delete, then
Menu Key > Remove account > OK.
Setting a photo as the wallpaper
1. Tap the photo you want to set as wallpaper to open it.
2. Tap the
Menu Key > Set image as > Home Lcd wallpaper.
3. Crop the image as desired and tap
OK.
Recording a video and taking a picture while recording
1. From the Home Lcd, tap
Camera icon and slide the
Mode Switch button down to change to Video mode. The
Capture icon will change to
Record icon.
2. The video camera’s viewfinder will appear on the Lcd.
3. Holding the phone horizontally, point the lens towards the subject of the video.
4. Tap
Record icon once to start recording.
5. A timer showing the length of the video is displayed at the top left corner of the Lcd.
6. Tap Stop to stop recording.
TIP: Tap the
Picture icon on the Lcd to take a picture while youre recording.
How to save music/video files to the phone
Connect your phone to the PC using the USB cable.Youll receive a notification that the USB is connected and the USB connection type prompt is displayed. Tap Media sync (MTP) or Camera (PTP) and open the folder you wish to view from your computer.
Save music or video files from the PC to the phone.- You may copy or move files from the PC to the phones removable storage using a card reader.
- If there is a video file with a subtitle file (.smi file with the same name as the video file), place them in the same folder to display the subtitle automatically when playing the video file.
- When downloading music or video files, copyright must be secured. Please note that a corrupted file or file with a wrong extension may cause damage to the phone.
Using SmartShare
The SmartShare application uses DLNA (Digital Living Network Alliance) technology to share digital content through a wireless network. Both Phones must be DLNA certified to support this feature.
To turn SmartShare on and allow sharing contents
1. From the Home Lcd, tap the Apps Key > SmartShare .
2. Tap the Menu Key > Settings.
3. Tap Contents share to allows sharing contents with nearby devices.
- Tap Sharing requests to select an action to perform when receiving sharing requests.
- Tap Receive files if you would like to allow the other devices to upload media files to my phone.
4. Tap Shared contents and select what type of file you want to share.
NOTE: Make sure that the Receive files option in the Settings menu is checked.
5. SmartShare is now activated and ready to share contents.
To control your renderer devices
Let your renderer device (e.g. TV) play multimedia contents from your remote content library (e.g. PC)
NOTE: Make sure that the DLNA functionality of your devices is properly configured (e.g. TV and PC)
1. From the Home Lcd, tap the Apps Key > SmartShare icon.
2. Tap the
Player button and select the device from the renderer device list.
3. Tap the Library button and select the device from the remote content library.
4. You can browse the content library.
5. Tap the Menu Key > Play.
To share contents from your phone to your renderer device (e.g. TV) NOTE: Make sure that your renderer device is properly configured.
1. While viewing pictures and videos in the Gallery application, tap at the top of the Lcd.
2. Select the device from the renderer device list to play the files.
NOTE: Follow the similar steps to use the Music, Videos or Polaris Office to share contents.
NOTICE: Check that your device is connected with your home network using Wi-Fi connection to use this application. Some DLNA enabled devices (e.g. TV) support only the DMP feature of DLNA and will
not appear in the renderer device list. Your device might not be able to play some contents.
To download contents from the remote content library
1. From the Home Lcd, tap the Apps Key > SmartShare .
2. Tap the Library button and select the device from the remote content library.
3. You can browse the content library.
4. Tap and hold a content thumbnail and then touch Download.
NOTICE: A few types of contents are not supported.
To upload contents from the remote content library
1. From the Home Lcd, tap the Apps Key > SmartShare .
2. Tap the Library button and select My phone.
3. You can browse the content library.
4. Tap and hold a content thumbnail and then touch Upload.
5 Select a device from the remote content library to be uploaded.
NOTICE: Some DLNA enabled devices do not support the DMS upload functionality and will not upload files. A few types of contents are not supported.