Showing posts with label Tips. Show all posts
Showing posts with label Tips. Show all posts
Friday, November 21, 2014
6 simple tips to fix damaged smartphone you must know
Being a long period of time, smartphones have been an essential part of our daily life, whether on working, or stay at home on weekends, we use the smartphones to contact with others, listen to our favorite music or watch the most enjoyable videos and so on. We can even say that, for most of us, taking a smartphone is no different than carrying our wallet. But like most electronic devices, something or the other can go wrong with the best of them even if you take care of them even you take care of them seriously. So when that happened, what should we do?
When parts of our smartphones go wrong, we will immediately think of taking them to a service center. But many problems are either not covered in the warranty, or a heavy bill and inconvenience awaits the user. In fact, most of the time, the condition of your favorite gadget may actually not be as bad as it seems and you can easily fix the problem yourself by following some simple steps, and here are some tips.What you do if you’re Phone gets wet?
 If your phone gets wet accidentally, remove your phones battery immediately and then use a towel to dry the physical parts of the smartphone and once finish it, bury your phone and the battery in a bowl full of rice. The rice will absorb all the water and moisture from the device. You should never try to switch the phone on as it may cause short-circuiting in the phone and may lead to a bigger loss for you.
One of the best things you can do is to place the wet smartphone on the back of your PC monitor or TV Lcd over the heat vents. The conventional heat waves coming out of these devices are perfect to dry and fix your phone. Else, you can place the smartphone in front of the air conditioner as well. Since the cold air coming from the AC is dry, it will dry up your phone quicker than you may expect.
To be on the safer side you can later use a hair dryer to remove the remaining moisture and water from the phone, however, never use a dryer as the first solution. This will worsen the situation by blowing the water droplets into deeper areas of your phone. Scratches on the Lcd
The scratches that will appear on Lcd sooner if you using your smartphone without a Lcd guard.
But don’t be afraid, toothpaste can help you fix those scratches and make you phones Lcd as shiny as your teeth. Just put toothpaste on the Lcd and gently rub it in circular motion with a soft cloth or cotton and then wipe the whole thing with a soft and slightly damp cloth.
Note: Make sure it is a toothpaste and not a tooth gel.Stuck pixels
Stuck pixels are the dead pixels that appear on the smartphone Lcd as a stationary black dot or a bright white or red spot. You can try removing them by gently massaging the area around the stuck pixel with a soft cloth. By this method, you are allowing the pixel to reorient itself and regain color.Phone shuts-off randomly
If your phone shut off randomly for times, it shows that you have dropped your phone a good number of times or the battery is loose. When this happened, all that you have to do is to take a small bit of paper and fold it. Then open the back cover of your phone and insert the folded bit of paper between the edge of the battery and the edge of the phone, on the opposite side where the terminals of the battery are located. This will keep the battery firmly in place and stop your phone from shutting down.How to extend battery life?
Have you encountered this problem, recently you bought a new phone battery but it is losing charge within weeks? When face this problem, you can try keeping it in the refrigerator.
Keeping them in cold environment not only extends their life but also increases their power. But make sure that the batteries are wrapped in a poly bag or a zip lock bag while they are inside the refrigerator.
You can also try to solve the problem by turning off Lcds auto-rotate function, Bluetooth, reducing the Lcd brightness and GPS. If you are not really bothered about using the Wi-Fi and have an internet pack activated, you can switch off the Wi-Fi as well. However, if the problem still persists, it is likely a software issue and you must take your phone to a technician.Fixing crashed Android apps
An Android app can crash within minutes of downloading and can cause your phone to hang. Reasons can be many but you can fix it by following these steps. Pull the battery slowly from the phone. This step is called soft reset and doesnt affect data in your phone, but can help you resolve issues such as a crashed app.
Once your phone restarts, you can go to Google Play > My Apps and then click on the app to update it. If an update is not available then simply uninstall the app and then reinstall it.
If you really enjoyed this article, welcome to share your views and suggestion via comments.
ReadMore

When parts of our smartphones go wrong, we will immediately think of taking them to a service center. But many problems are either not covered in the warranty, or a heavy bill and inconvenience awaits the user. In fact, most of the time, the condition of your favorite gadget may actually not be as bad as it seems and you can easily fix the problem yourself by following some simple steps, and here are some tips.What you do if you’re Phone gets wet?
If your phone gets wet accidentally, remove your phones battery immediately and then use a towel to dry the physical parts of the smartphone and once finish it, bury your phone and the battery in a bowl full of rice. The rice will absorb all the water and moisture from the device. You should never try to switch the phone on as it may cause short-circuiting in the phone and may lead to a bigger loss for you.One of the best things you can do is to place the wet smartphone on the back of your PC monitor or TV Lcd over the heat vents. The conventional heat waves coming out of these devices are perfect to dry and fix your phone. Else, you can place the smartphone in front of the air conditioner as well. Since the cold air coming from the AC is dry, it will dry up your phone quicker than you may expect.
To be on the safer side you can later use a hair dryer to remove the remaining moisture and water from the phone, however, never use a dryer as the first solution. This will worsen the situation by blowing the water droplets into deeper areas of your phone.
The scratches that will appear on Lcd sooner if you using your smartphone without a Lcd guard.
But don’t be afraid, toothpaste can help you fix those scratches and make you phones Lcd as shiny as your teeth. Just put toothpaste on the Lcd and gently rub it in circular motion with a soft cloth or cotton and then wipe the whole thing with a soft and slightly damp cloth.
Note: Make sure it is a toothpaste and not a tooth gel.Stuck pixels
Stuck pixels are the dead pixels that appear on the smartphone Lcd as a stationary black dot or a bright white or red spot. You can try removing them by gently massaging the area around the stuck pixel with a soft cloth. By this method, you are allowing the pixel to reorient itself and regain color.Phone shuts-off randomly
If your phone shut off randomly for times, it shows that you have dropped your phone a good number of times or the battery is loose. When this happened, all that you have to do is to take a small bit of paper and fold it. Then open the back cover of your phone and insert the folded bit of paper between the edge of the battery and the edge of the phone, on the opposite side where the terminals of the battery are located. This will keep the battery firmly in place and stop your phone from shutting down.How to extend battery life?
Have you encountered this problem, recently you bought a new phone battery but it is losing charge within weeks? When face this problem, you can try keeping it in the refrigerator.
Keeping them in cold environment not only extends their life but also increases their power. But make sure that the batteries are wrapped in a poly bag or a zip lock bag while they are inside the refrigerator.
You can also try to solve the problem by turning off Lcds auto-rotate function, Bluetooth, reducing the Lcd brightness and GPS. If you are not really bothered about using the Wi-Fi and have an internet pack activated, you can switch off the Wi-Fi as well. However, if the problem still persists, it is likely a software issue and you must take your phone to a technician.Fixing crashed Android apps
An Android app can crash within minutes of downloading and can cause your phone to hang. Reasons can be many but you can fix it by following these steps. Pull the battery slowly from the phone. This step is called soft reset and doesnt affect data in your phone, but can help you resolve issues such as a crashed app.
Once your phone restarts, you can go to Google Play > My Apps and then click on the app to update it. If an update is not available then simply uninstall the app and then reinstall it.
If you really enjoyed this article, welcome to share your views and suggestion via comments.

Friday, October 17, 2014
Sunday, October 5, 2014
HTC Desire 501 Tips and Tricks How To
 It is very important if you know some tips on your device like HTC Desire 501. It will help you learn more about your device to make your life much easier in using it. Improving your productivity and fulfilling what you expected on your HTC Desire 501.
Here are some How Tos for your HTC Desire 501. These How Tos may still not yet complete and I am finding some time to work on the others:
How to Factory Reset (Hard Reset) HTC Desire 501
Resetting your HTC Desire 501 will restore the default settings of your device. It will also delete all your files on your phone, so it is recommended to have a backup of your important files on your computer. There are two ways on how to reset your HTC Desire 501. It can be done through the settings or through the hardware buttons.
Resetting HTC Desire 501 on Settings:
- Slide the Notifications panel open, and then tap the Gear Icon or Settings.
- Select Backup & reset.
- Tap Reset phone.
- If you want to delete all your files, then tap Erase all data.
- Then tap OK to confirm.
These steps is also helpful when your HTC Desire 501 is unresponsive or frozen and theres no way to access the settings.
- First, press and hold the Volume Down button, and then do the same way on the Power button.
- Hold the two buttons until the three Android images appear on the Lcd.
- Release the button when the three Android images appear and press Volume Down.
- Tap on Factory Reset, and then press the Power Button to confirm.
Contacts is very important for everyone of us. We cant connect to our friends without a contact number. If you have a new phone, saving contacts on the phone one by one is so hassle. But now, theres an easy way how to transfer or import your contacts from your old phone to your new phone.
Use your PC to transfer contacts to your new phone. This process is applicable in several phone brands, including iPhone, Samsung, HTC and Nokia.
You just need an Internet Connection on your PC, your old and new phone and their own USB cable.
Then you need to install the PC Companion program. This is a free application and the installation files are already saved on your new phone. This program can also be used in updating your phone software.
Please note that if you are using the Microsoft Windows 7 operating system on your PC, make sure that the AutoPlay setting is enabled.
To check your settings:
Click Start > Control Panel, then type "autoplay" on the search box. Click the AutoPlay, and mark the check box Use AutoPlay for all media and devices.
Installing the PC Companion:
Installing the PC Companion:
- Turn on your new Phone and connect it to your PC.
- On your new Phone, tap "Install" to install PC Companion on the PC.
- On your computer, if a pop-up window that appears notifies you about available PC Software, select Run Startme.exe.
- Then click Install to start the installation and then follow the instructions to complete the installation.
If you are not prompted with a pop-up window to install the PC Companion, you can also download the PC Companion here.
Transferring your contacts to your new phone:
- Make sure that PC Companion is installed on your PC.
- Open the PC Companion application on your PC.
- Then click Contacts Setup and follow the instructions to transfer your contacts.
How to Send a Multimedia Message and Create a Slideshow on HTC Desire 501
Text messaging has grown its popularity over the years especially to younger generations. People, especially teens, prefer to communicate with friends and relatives thru texting instead of the traditional call. But whether your reaching out to friends thru text or a call, what matters most is the effort for still trying to keep in touch despite distance and even on busy schedules. We should be more grateful these days as it only takes minutes, even seconds, for a quick response unlike the old school snail mail. Now, everyone is just a text away. And more to that, you can even send multimedia messages (MMS) especially on special occasions to add more touch to a simple text-filled Lcd. Heres how you can send a MMS on HTC Desire 501.
1. On your devices homeLcd, tap on
 and go to Messages.
2. Then tap on

3. On the To Field, key in a contact name, mobile number or email address. You can also send it to a group of friends by tapping on

4. To add a subject line, tap on
 and go to Add Subject.
5. Tap on the box that says Add text and there you can type in your special message.
6. Choose an attachment for your message by tapping on

7. After you browse and select an attachment, tap on Send or press
 to save it as a draft. You can also tap on
 to see options like replacing, viewing and removing your attachment.
Now if you wish your Mutimedia Message to reach an extra mile, you can have it on a slideshow format. Heres how you can create one:
once again and select Slide.2. Then choose where you want to insert the next slide.
3. When youre done adding the next slide, you can either do the following:
- tap onand choose to add a video or a photo
- tap onand then audio if you want to add a voice recording or a music to the slide
- tap on Add Text to add a caption
- tap onto view options like replacing, viewing or removing your attachment.
select Preview. If you dont see Preview, scroll down the menu. To view the playback controls, tap once the preview Lcd.5. When its all set and done, press on or tap on Send to save message as a draft.
or tap on Send to save message as a draft.Now you can make someones day a very special one with this creative and personalize MMS.
How to Set HTC Desire 501 into Sleep Mode
How to Set HTC Desire 501 into Sleep Mode
Like any other device, setting HTC Desire 501 into sleep mode will somehow save its battery life. Sleep mode puts your device into a lower power state while the display is off. It also prevents accidental button presses when its in your pocket or bag. Heres how you can set HTC Desire 501 into sleep mode.
1. Briefly press on your devices Power button to turn off the display. Then switch to Sleep Mode.
2. To change the time before your device sleeps, just go to Display & buttons settings.
3. To wake it up, manually press the Power button and unlock your Lcd.
4. Your device will also automatically wakes up when you have an incoming call.
How to Extend Battery Life of HTC Desire 501
1. Briefly press on your devices Power button to turn off the display. Then switch to Sleep Mode.
2. To change the time before your device sleeps, just go to Display & buttons settings.
3. To wake it up, manually press the Power button and unlock your Lcd.
4. Your device will also automatically wakes up when you have an incoming call.
How to Extend Battery Life of HTC Desire 501
Battery Life depends on how you use your device. For HTC Desire 501 device, if you want to save your battery to last longer hours, you may need to adjust your settings. Follow these suggestions:
• Turn on the power-saving option on the device. Then lessen the Lcd brightness and the Lcd lock timeout.
1. Slide the Notifications panel open.
- You can also choose which phone features to conserve the power. Just tap the Power saver notification first before you turn power saver mode on.
2. To turn the power saver mode on or off, tap the check button next to the Power saver notification.
• Turn down your device volume with the volume keys.
• Close any apps or features when you are done using it so they will not continuously running in the background.
• Turn off the network connection if you are out of range so that your device will stop searching for a network signal.
• You should use the latest version of the software update. Software updates improves some features and fixes some bugs on the previous software version.
• Turn off the camera flash.
• The camera viewfinder can be a power drain, so after youve finished taking photos.
How to Take Continuous Camera Shots on HTC Desire 501
Want to take photos continuously on your HTC Desire 501? You just need to set the settings and you can now capture the moment of the action. Every movement of the action counts, so take the photo continuously.
Follow these steps:
1. First, make sure that youre in Normal scene to use this feature.
2. On the Viewfinder Lcd, just press and hold on .
.
.- It should take 20 consecutive shots since it is the default settings.
- If you want to capture more than 20 shots, just tap on the Gear Icon or Settings, then Continuous shooting. After that, clear the Limit to 20 frames option.
3. You can also select the photo that you like most by tapping Best shot. If you dont want the other photos, then you can delete it.
How to Check Battery Usage and History on HTC Desire 501
Keeping our phones at top shape at all times is a serious task. As much as possible, we try to save as much power as we can for our phones to last longer especially if were hitting the road. If youve noticed, here in Zakyri, we always make posts on our blog on ways to save a phones battery life. I might as well share these steps for all HTC Desire 501 users out there on how you can check battery usage on your phone. In this way you can see a ranking list of apps that are consuming up your battery life and even how long youve been using up your phone since the last charge. This is a pretty good information when you badly need to save up your battery life.
To check on each apps battery consumption:
1. On your homeLcd, slide the Notifications panel open.
2. Then tap
3. Choose and tap on Power and go to Usage.
4. And tap an app to check how its using up your phones battery and other use details.
If you see a button while viewing an apps battery use details, you can tap that button to adjust its settings that affect your battery usage, you can stop the app and more.
To check on your battery history
1. On your homeLcd, slide the Notifications panel open.
2. Then tap.
.3. Choose and tap on Power and go to History.
4. Now swipe left or right ( or spread or pinch your fingers) to scale the graph that details your battery usage over the time.
How to Clear Call History on HTC Desire 501
Either your call logs are just piling up or you simply want to achieve a clean call history list, then you can do the steps below. Heres how to delete or clear call history on your HTC Desire 501 device.
To delete one name or number
1. On your devices Call History tab, press and hold the name or number you wish
to delete.
2. And tap Delete from call history.
To delete the entire call history list
1. On Call History tab, tapthen go to Remove call history.
then go to Remove call history.2. On the Delete from call history Lcd, tap
3. Choose Select all and then tap Delete.
How to Hide Missed Calls and Messages on HTC Desire 501 LockLcd
Some mobile users want to check if theres any missed calls or messages right when they pick up their phone even if its locked. But if youre like me who prefers a clean lockLcd, free from missed calls and messages notification, then you might as well follow these steps to keep them hidden. Heres how you can hide those info on a HTC Desire 501 lockLcd.
1. First, slide the Notifications panel open.
2. Then tap .
.
.3. Now go to Security.
4. And clear the Phone notification preview and Message notification preview options to hide missed calls and messages on the lockLcd.
Now you can appreciate more how your phone looks like when its locked. Looking clean and free.
How to Personalize HTC Desire 501 Launch Bar
A launch bar is a one stop hub on your homeLcd for commonly used apps. By personalizing your launch bar you can now have a one-touch access to apps that you often use. These apps and shortcuts on your launch bar are also what you see on the lockLcd. Heres how you can personalize your HTC Desire 501 launch bar.
1. On your devices homeLcd, tapto go to the All apps view.
to go to the All apps view.2. Now press and hold the app you want to be replaced and then drag it out
of the launch bar.
3. Then press and hold an app you frequently use and drag it to the empty slot
on your launch bar.
If you have couple of apps to place on your launch bar, you can group them into a folder and place them in the launch bar. Heres how you can group apps into a folder.
1. On the All apps view of your device, press and hold an app and drag it over
to another app to automatically create a new folder for these apps.
2. To add more apps, press and hold an app and drag it to the folder.
3. Now drag the folder from the All apps view to the launch bar.
4. If you want to remove an app from a folder on the launch bar, you need to
switch first to the All apps view and then drag the app out of the folder.
Congratulations! You have just personalized your HTC Desire 501 launch bar with your favorite apps.
How to Set up Speed Dialing on HTC Desire 501
Speed dialing is definitely a must-have feature on any phones. Whether youre in a hurry or in an emergency, this feature lets you call important contacts right away by just dialing a number key on your phone. For all HTC Desire 501 users, heres how you can set up speed dialing on your device.
1. First, open the phone app on your device.
2. Then tapand go to Speed Dial.
and go to Speed Dial.3. Now tapand select a contact from the list.
and select a contact from the list.4. On the Speed dial Lcd, choose the phone number of the contact to use
and a speed dial key to assign for that contact.
5. Once your done, tap Save.
Take note that the number 1 key is generally used and reserved for calling voicemail and retrieving voicemail messages.
How to Make Your HTC Desire 501 a Wireless Router
Smartphones these days can now share its mobile data connection and act as a portable Wi-Fi hotspot. And like those high-end gadgets, HTC Desire 501 is sure to let you experience the benefits of making it as a portable Wi-Fi hotspot. Heres how you can make your HTC Desire 501 phone the next Wi-Fi hotspot.
- Slide the Notifications panel open, and then tap the Gear Icon or Settings.
- Under Wireless & Network, tap More.
- Select Mobile network sharing > Portable Wi-Fi hotspot settings.
- Enter your preferred router name, or you can also use the default name.
- Choose the type of security and set a password for your wireless router. (If you selected none, then you dont have to enter a password.)
- Select the Portable Wi-Fi Hotspot option to turn on the wireless router.
When you see the router wireless icon, then your HTC Desire 501 is ready to be used as a router.
Copying Files to or from HTC Desire 501
You can copy your music, photos, and other files to HTC Desire 501.
1. Connect HTC Desire 501 to the computer using the supplied USB cable. Youll see options for viewing or importing files on the computer Lcd.
2. Choose to view files.
3. Copy the files from your computer to HTC Desire 501, or vice versa.
4. After copying the files, disconnect HTC Desire 501 from the computer.
Copying Files to or from HTC Desire 501
You can copy your music, photos, and other files to HTC Desire 501.
1. Connect HTC Desire 501 to the computer using the supplied USB cable. Youll see options for viewing or importing files on the computer Lcd.
2. Choose to view files.
3. Copy the files from your computer to HTC Desire 501, or vice versa.
4. After copying the files, disconnect HTC Desire 501 from the computer.
Thursday, October 2, 2014
Samsung Galaxy Note 8 0 Tips and Tricks
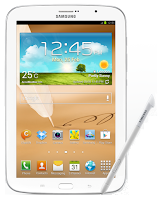
Here are some How Tos for your Samsung Galaxy Note 8.0. These How Tos may still not yet complete and I am still working on the others:
How to Factory Reset Samsung Samsung Galaxy Note 8.0
Restoring the default settings or factory reset your Samsung Galaxy Note 8.0 will delete all your existing files. It is recommended to backup your important files on your computer before attempting to reset your device.
The steps below are the instructions on how to factory reset your Samsung Galaxy Note 8.0:
Step 1. On your HomeLcd, tap on MENU icon.
Step 2. Select "Settings", then scroll down and tap "Backup and reset" option.
Step 3. Then tap on “Factory Data Reset”.
Step 4. Read warning carefully before tapping the “Reset Device”.
Step 5. If you want to proceed in resetting your device, tap on “Delete All” to confirm the Reset.
Now, you just need to wait while your device is resetting. It should reboot itself and you will have a new start on your Samsung Galaxy Note 8.0.
You may also use the shortcut method using the code: Enter *2767*3855# on your device.
How to Reduce the Battery Consumption on Samsung Galaxy Note 8.0
Battery Life depends on how you use your device. For Samsung Galaxy Note 8.0 device, if you want to save your battery to last longer hours, you may need to adjust your settings.
All of us want to have a longer battery life on our phones. Follow these suggestions to reduce the battery consumption:
- Switch to Sleep mode by pressing the Power key when you are not using your device.
- Close any apps or features when you are done using it so they will not continuously running in the background.
- Turn off the network connection if you are out of range so that your device will stop searching for a network signal. (deactivate the Bluetooth feature, turn off the Wi-Fi feature when not in use, etc).
- Deactivate auto-syncing of applications.
- Decrease the backlight time.
- Lessen the Lcd brightness and the Lcd lock timeout.
Extend battery life when the Pen is attached:
- From your Home Lcd, tap on Apps icon.
- Select Settings, then go to S Pen.
- Then tap on Battery saving.
How to Reformat Memory Card on Samsung Galaxy Note 8.0
Formatting the memory card on your Samsung Galaxy Note 8.0 will delete all the files that is stored on the memory card. It is recommended to backup your important files on your computer before attempting to format your memory card.
You may not be able to reformat your memory card on your computer. So try it through your device:
1. On your Home Lcd, tap Apps.
2. Select Settings.
3. Go to Storage.
4. Then tap Format SD card.
5. Just follow the on-Lcd instruction on how to confirm the format.
How to Secure Your Samsung Galaxy Note 8.0 (Face Unlock, Face and Voice Unlock, Pattern and Password)
Securing your Samsung Galaxy Note 8.0 is also important, specially if you have a private files that you dont want others to access it. So to prevent others from using your or accessing your personal data without your permission, then you may need to activate the security features. The device requires an unlock code whenever unlocking it.
Setting a face unlock:
1. On the Applications Lcd, tap Settings.
2. Select Lock Lcd.
3. Then choose Screen lock.
4. Tap Face unlock.
Fit your face in the frame to be captured. Then, set a backup unlock PIN or pattern to unlock the Lcd in case the face unlock fails.
Setting a face and voice unlock:
1. On the Applications Lcd, tap Settings.
2. Select Lock Lcd.
3. Then choose Screen lock.
4. Tap Face and voice.
Fit your face in the frame to be captured and then set a voice command. Then, set a backup unlock PIN or pattern to unlock the Lcd in case the face and voice unlock fails.
Setting a pattern:
1. On the Applications Lcd, tap Settings.
2. Select Lock Lcd.
3. Then choose Screen lock.
4. Tap Pattern.
Draw a pattern by connecting four dots or more, and then draw the pattern again to verify it. Set a backup unlock PIN to unlock the Lcd when you forget the pattern.
Setting a PIN:
1. On the Applications Lcd, tap Settings.
2. Select Lock Lcd.
3. Then choose Screen lock.
4. Tap PIN.
Enter at least four numbers, and then enter the password again to verify it.
Setting a password:
1. On the Applications Lcd, tap Settings.
2. Select Lock Lcd.
3. Then choose Screen lock.
4. Tap Password.
Enter at least four characters including numbers and symbols, and then enter the password again to verify it.
Setting a face unlock:
1. On the Applications Lcd, tap Settings.
2. Select Lock Lcd.
3. Then choose Screen lock.
4. Tap Face unlock.
Fit your face in the frame to be captured. Then, set a backup unlock PIN or pattern to unlock the Lcd in case the face unlock fails.
Setting a face and voice unlock:
1. On the Applications Lcd, tap Settings.
2. Select Lock Lcd.
3. Then choose Screen lock.
4. Tap Face and voice.
Fit your face in the frame to be captured and then set a voice command. Then, set a backup unlock PIN or pattern to unlock the Lcd in case the face and voice unlock fails.
Setting a pattern:
1. On the Applications Lcd, tap Settings.
2. Select Lock Lcd.
3. Then choose Screen lock.
4. Tap Pattern.
Draw a pattern by connecting four dots or more, and then draw the pattern again to verify it. Set a backup unlock PIN to unlock the Lcd when you forget the pattern.
Setting a PIN:
1. On the Applications Lcd, tap Settings.
2. Select Lock Lcd.
3. Then choose Screen lock.
4. Tap PIN.
Enter at least four numbers, and then enter the password again to verify it.
Setting a password:
1. On the Applications Lcd, tap Settings.
2. Select Lock Lcd.
3. Then choose Screen lock.
4. Tap Password.
Enter at least four characters including numbers and symbols, and then enter the password again to verify it.
P.S. To learn how to earn Minimum of $4,485 per Week, CLICK HERE and Watch the Video.
Tuesday, September 30, 2014
HTC First Tips and Tricks
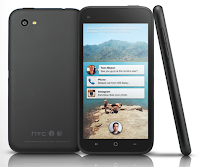
Here are some How Tos for your HTC First. These How Tos may still not yet complete and I am finding some time to work on the others:
How to Factory Reset (Hard Reset) HTC First
Resetting your HTC First will restore the default settings of your device. It will also delete all your files on your phone, so it is recommended to have a backup of your important files on your computer. There are two ways on how to reset your HTC First. It can be done through the settings or through the hardware buttons.
Resetting HTC First on Settings:
Resetting HTC First by Hardware Buttons:
These steps is also helpful when your HTC First is unresponsive or frozen and theres no way to access the settings.
Soft Reset:
Press and hold the Power button for at least 10 seconds. HTC First then restarts.
How to Import Contacts From Old Phone to New Phone (on iPhone, Samsung, HTC and Nokia)
Contacts is very important for everyone of us. We cant connect to our friends without a contact number. If you have a new phone, saving contacts on the phone one by one is so hassle. But now, theres an easy way how to transfer or import your contacts from your old phone to your new phone.
Use your PC to transfer contacts to your new phone. This process is applicable in several phone brands, including iPhone, Samsung, HTC and Nokia.
You just need an Internet Connection on your PC, your old and new phone and their own USB cable.
If you are not prompted with a pop-up window to install the PC Companion, you can also download the PC Companion here.
How to Open and Customize the App Launcher on HTC First
By adding your favourite or often used apps on the app launcher, you can then open apps in just a snap. The steps below will show you how to open HTC First’s app launcher and even customize it for easy access.
Resetting your HTC First will restore the default settings of your device. It will also delete all your files on your phone, so it is recommended to have a backup of your important files on your computer. There are two ways on how to reset your HTC First. It can be done through the settings or through the hardware buttons.
Resetting HTC First on Settings:
- Slide the Notifications panel open, and then tap the Gear Icon or Settings.
- Select Backup & reset.
- Tap Reset phone.
- If you want to delete all your files, then tap Erase all data.
- Then tap OK to confirm.
These steps is also helpful when your HTC First is unresponsive or frozen and theres no way to access the settings.
- First, press and hold the Volume Down button, and then do the same way on the Power button.
- Hold the two buttons until the three Android images appear on the Lcd.
- Release the button when the three Android images appear and press Volume Down.
- Tap on Factory Reset, and then press the Power Button to confirm.
Soft Reset:
Press and hold the Power button for at least 10 seconds. HTC First then restarts.
Contacts is very important for everyone of us. We cant connect to our friends without a contact number. If you have a new phone, saving contacts on the phone one by one is so hassle. But now, theres an easy way how to transfer or import your contacts from your old phone to your new phone.
Use your PC to transfer contacts to your new phone. This process is applicable in several phone brands, including iPhone, Samsung, HTC and Nokia.
You just need an Internet Connection on your PC, your old and new phone and their own USB cable.
Then you need to install the PC Companion program. This is a free application and the installation files are already saved on your new phone. This program can also be used in updating your phone software.
Please note that if you are using the Microsoft Windows 7 operating system on your PC, make sure that the AutoPlay setting is enabled.
To check your settings:
Click Start > Control Panel, then type "autoplay" on the search box. Click the AutoPlay, and mark the check box Use AutoPlay for all media and devices.
Installing the PC Companion:
Installing the PC Companion:
- Turn on your new Phone and connect it to your PC.
- On your new Phone, tap "Install" to install PC Companion on the PC.
- On your computer, if a pop-up window that appears notifies you about available PC Software, select Run Startme.exe.
- Then click Install to start the installation and then follow the instructions to complete the installation.
If you are not prompted with a pop-up window to install the PC Companion, you can also download the PC Companion here.
Transferring your contacts to your new phone:
- Make sure that PC Companion is installed on your PC.
- Open the PC Companion application on your PC.
- Then click Contacts Setup and follow the instructions to transfer your contacts.
How to Set HTC First into Sleep Mode
Like any other device, setting HTC First into sleep mode will somehow save its battery life. Sleep mode puts your device into a lower power state while the display is off. It also prevents accidental button presses when its in your pocket or bag. Heres how you can set HTC First into sleep mode.
1. Briefly press on your devices Power button to turn off the display. Then switch to Sleep Mode.
2. To change the time before your device sleeps, just go to Settings > Display.
3. To wake it up, manually press the Power button and unlock your Lcd.
4. Your device will also automatically wakes up when you have an incoming call.
How to Extend Battery Life of HTC First
1. Briefly press on your devices Power button to turn off the display. Then switch to Sleep Mode.
2. To change the time before your device sleeps, just go to Settings > Display.
3. To wake it up, manually press the Power button and unlock your Lcd.
4. Your device will also automatically wakes up when you have an incoming call.
How to Extend Battery Life of HTC First
Battery Life depends on how you use your device. For HTC First device, if you want to save your battery to last longer hours, you may need to adjust your settings. Follow these suggestions:
• Monitor the usage of your battery:
1. On the Apps Lcd, tap Settings.
2. Tap Battery.
3. Tap an app to check how its using the battery. Youll see how much battery power is used
• Turn down your device volume with the volume keys.
• Then lessen the Lcd brightness and the Lcd lock timeout.
• Close any apps or features when you are done using it so they will not continuously running in the background.
• Turn off the network connection if you are out of range so that your device will stop searching for a network signal.
• You should use the latest version of the software update. Software updates improves some features and fixes some bugs on the previous software version.
• Turn off the camera flash.
• The camera viewfinder can be a power drain, so after youve finished taking photos.
How to Take Screenshots on HTC First
Did you just create a nice piece of art on your new HTC First phone? Or perhaps youve just personalized your Lcd, or share your high game score and want others to know how youve come up with it.Well, take a Lcdshot and brag it to your friends. Its easy to take a picture of the Lcd and share it from Gallery.
• Monitor the usage of your battery:
1. On the Apps Lcd, tap Settings.
2. Tap Battery.
3. Tap an app to check how its using the battery. Youll see how much battery power is used
• Turn down your device volume with the volume keys.
• Then lessen the Lcd brightness and the Lcd lock timeout.
• Close any apps or features when you are done using it so they will not continuously running in the background.
• Turn off the network connection if you are out of range so that your device will stop searching for a network signal.
• You should use the latest version of the software update. Software updates improves some features and fixes some bugs on the previous software version.
• Turn off the camera flash.
• The camera viewfinder can be a power drain, so after youve finished taking photos.
How to Take Screenshots on HTC First
Did you just create a nice piece of art on your new HTC First phone? Or perhaps youve just personalized your Lcd, or share your high game score and want others to know how youve come up with it.Well, take a Lcdshot and brag it to your friends. Its easy to take a picture of the Lcd and share it from Gallery.
Heres how you can capture a Lcdshot of your HTC First device.
- Simultaneously press and hold Power and Volume Down buttons.
- The Lcd is saved in the Screenshots album in Gallery.
How to Clear Call History on HTC First
Either your call logs are just piling up or you simply want to achieve a clean call history list, then you can do the steps below. Heres how to delete or clear call history on your HTC First device.
To delete one name or number
1. On your devices Call History tab, press and hold the name or number you wish to delete.
2. And tap Delete from call history.
To delete the entire call history list
1. On Call History tab, tapthen go to Remove call history.
2. On the Delete from call history Lcd, tap
3. Choose Select all and then tap Delete.
How to Make Your HTC First a Wireless Router/Portable Wi-Fi Hotspot
Smartphones these days can now share its mobile data connection and act as a portable Wi-Fi hotspot. And like those high-end gadgets, HTC First is sure to let you experience the benefits of making it as a portable Wi-Fi hotspot. Heres how you can make your HTC First phone the next Wi-Fi hotspot.
Either your call logs are just piling up or you simply want to achieve a clean call history list, then you can do the steps below. Heres how to delete or clear call history on your HTC First device.
To delete one name or number
1. On your devices Call History tab, press and hold the name or number you wish to delete.
2. And tap Delete from call history.
To delete the entire call history list
then go to Remove call history.2. On the Delete from call history Lcd, tap
3. Choose Select all and then tap Delete.
How to Make Your HTC First a Wireless Router/Portable Wi-Fi Hotspot
Smartphones these days can now share its mobile data connection and act as a portable Wi-Fi hotspot. And like those high-end gadgets, HTC First is sure to let you experience the benefits of making it as a portable Wi-Fi hotspot. Heres how you can make your HTC First phone the next Wi-Fi hotspot.
- Slide the Notifications panel open, and then tap the Gear Icon or Settings.
- Under Wireless & Network, tap More.
- Select Mobile network sharing > Portable Wi-Fi hotspot settings.
- Enter your preferred router name, or you can also use the default name.
- Choose the type of security and set a password for your wireless router. (If you selected none, then you dont have to enter a password.)
- Select the Portable Wi-Fi Hotspot option to turn on the wireless router.
When you see the router wireless icon, then your HTC First is ready to be used as a router.
How to Open and Customize the App Launcher on HTC First
By adding your favourite or often used apps on the app launcher, you can then open apps in just a snap. The steps below will show you how to open HTC First’s app launcher and even customize it for easy access.
1. To open the app launcher from your cover feed Lcd,press and hold your profile picture and drag it to
2. Now you can share directly to Facebook by
tapping to post a status
to post a status tapping to post a photo
to post a photo tapping to check into a location.
to check into a location.3. To add your favorite apps to the app launcher for easy access, first swipe right to on the app launcher to see the list of all your apps.
4. And press and hold an app adn drag it to your app launcher on the right.
How to Use Facebook Camera on HTC First
HTC First allows you to snap photos and tag your Facebook friends right away. In this manner, youll get to post photos and tag your friends in an instant. Heres how to use the Facebook camera on HTC First.
How to Use Facebook Camera on HTC First
HTC First allows you to snap photos and tag your Facebook friends right away. In this manner, youll get to post photos and tag your friends in an instant. Heres how to use the Facebook camera on HTC First.
1. On top of the app launcher, tap on Photo.
Photo.2. Then at the bottom of then photo gallery Lcd, tap
.
3. Now youre ready to take a photo. Just point the camera at what you want to capture and tap
4. Once youre done taking a photo, tap
5. Tap on photos you want to post and tap
 to add description. And tap Post.
on photos you want to post and tapto add description. And tap Post.6. Tap a photo thumbnail and tap your friends faces to tag a photo.
How to Use Facebook Messenger on HTC First
When you dont feel like calling your pal using Facebooks free voice calls on your phone then Facebook messenger is a great alternative. Use this app to start private conversations via with your FB friends or to send text messages. Heres how you can use this app on HTC First.
How to Use Facebook Messenger on HTC First
When you dont feel like calling your pal using Facebooks free voice calls on your phone then Facebook messenger is a great alternative. Use this app to start private conversations via with your FB friends or to send text messages. Heres how you can use this app on HTC First.
1. On your device cover feed, press and hold your profile picture and drag it to
2. Then tap to choose a friend to message or simply type a mobile number to send a text.
to choose a friend to message or simply type a mobile number to send a text.3. Now type your message and then tap Send.
How to Turn on NFC on HTC First
Smartphones these days mostly have built-in Near Field Communication or NFC which allows easy sharing of contents like web pages, photos or contacts to someones NFC-enabled mobile device. Heres how to use this feature on HTC First.
How to Turn on NFC on HTC First
Smartphones these days mostly have built-in Near Field Communication or NFC which allows easy sharing of contents like web pages, photos or contacts to someones NFC-enabled mobile device. Heres how to use this feature on HTC First.
1. To turn on NFC and Android Beam feature on your phone, go to Settings.
2. Under Wireless and Networks, tap More.
3. Then from there you can now turn on the NFC and Android Beam options.
4. To share contents, both devices must have NFC and Android Beam feature turned on.
5. On the Lcd where you want to share the content, hold your device and the other device back to back.
6. You will then hear a sound and both devices will vibrate slightly when connected.
7. And tap Lcd which you want to share. Then the shared content will now appear on the recipients Lcd.
Thursday, September 25, 2014
Samsung Galaxy Fame Tips and Tricks
Here are some How Tos for your Samsung Galaxy Fame. These How Tos may still not yet complete and I am still working on the others:
How to Factory Reset (Hard Reset) Samsung Galaxy Fame
Restoring the default settings or factory reset your Samsung Galaxy Fame will delete all your existing files. It is recommended to backup your important files on your computer before attempting to reset your device.
The steps below are the instructions on how to factory reset your Samsung Galaxy Fame:
Step 1. On your HomeLcd, tap on MENU icon.
Step 2. Select "Settings", then scroll down and tap "Backup and reset" option.
Step 3. Then tap on “Factory Data Reset”.
Step 4. Read warning carefully before tapping the “Reset Device”.
Step 5. If you want to proceed in resetting your device, tap on “Erase everything” to confirm the Reset.
Now, you just need to wait while your device is resetting. It should reboot itself and you will have a new start on your Samsung Galaxy Fame.
You may also use the shortcut method using the code: Enter *2767*3855# on your device.
Hard Reset:
1. Turn off your device.
2. Then press and hold Volume Down + Home Button + Power On.
3. Wait for a few seconds until the Factory reset menu appears.
4. Select "wipe data/factory reset" by using the Volume Down button.
How to Reduce the Battery Consumption on Samsung Galaxy Fame
Battery Life depends on how you use your device. For Samsung Galaxy Fame device, if you want to save your battery to last longer hours, you may need to adjust your settings.
All of us want to have a longer battery life on our phones. Follow these suggestions to reduce the battery consumption:
- Switch to Sleep mode by pressing the Power key when you are not using your device.
- Close any apps or features when you are done using it so they will not continuously running in the background.
- Turn off the network connection if you are out of range so that your device will stop searching for a network signal. (deactivate the Bluetooth feature, turn off the Wi-Fi feature when not in use, etc).
- Deactivate auto-syncing of applications.
- Decrease the backlight time.
- Lessen the Lcd brightness and the Lcd lock timeout.
How to Reformat Memory Card on Samsung Galaxy Fame
Formatting the memory card on your Samsung Galaxy Fame will delete all the files that is stored on the memory card. It is recommended to backup your important files on your computer before attempting to format your memory card.
You may not be able to reformat your memory card on your computer. So try it through your device:
1. On your Home Lcd, tap Apps.
2. Select Settings.
3. Go to Storage.
4. Then tap Format SD card > Format SD card.
5. Tap Erase everything to confirm the action.
How to Import Contacts From Old Phone to New Phone (on Sony, iPhone, Samsung, HTC and Nokia)
Contacts is very important for everyone of us. We cant connect to our friends without a contact number. If you have a new phone, saving contacts on the phone one by one is so hassle. But now, theres an easy way how to transfer or import your contacts from your old phone to your new phone.
Use your PC to transfer contacts to your new phone. This process is applicable in several phone brands, including iPhone, Samsung, HTC and Nokia.
You just need an Internet Connection on your PC, your old and new phone and their own USB cable.
Then you need to install the PC Companion program. This is a free application and the installation files are already saved on your new phone. This program can also be used in updating your phone software.
Please note that if you are using the Microsoft Windows 7 operating system on your PC, make sure that the AutoPlay setting is enabled.
To check your settings:
Click Start > Control Panel, then type "autoplay" on the search box. Click the AutoPlay, and mark the check box Use AutoPlay for all media and devices.
Installing the PC Companion:
Installing the PC Companion:
- Turn on your new Phone and connect it to your PC.
- On your new Phone, tap "Install" to install PC Companion on the PC.
- On your computer, if a pop-up window that appears notifies you about available PC Software, select Run Startme.exe.
- Then click Install to start the installation and then follow the instructions to complete the installation.
If you are not prompted with a pop-up window to install the PC Companion, you can also download the PC Companion here.
Transferring your contacts to your new phone:
- Make sure that PC Companion is installed on your PC.
- Open the PC Companion application on your PC.
- Then click Contacts Setup and follow the instructions to transfer your contacts.
Securing your Samsung Galaxy Fame is also important, specially if you have a private files that you dont want others to access it. So to prevent others from using your or accessing your personal data without your permission, then you may need to activate the security features. The device requires an unlock code whenever unlocking it.
Setting a pattern:
1. On the Applications Lcd, tap Settings.
2. Select Lock Lcd.
3. Then choose Screen lock.
4. Tap Pattern.
Draw a pattern by connecting four dots or more, and then draw the pattern again to verify it. Set a backup unlock PIN to unlock the Lcd when you forget the pattern.
Setting a PIN:
1. On the Applications Lcd, tap Settings.
2. Select Lock Lcd.
3. Then choose Screen lock.
4. Tap PIN.
Enter at least four numbers, and then enter the password again to verify it.
Setting a password:
1. On the Applications Lcd, tap Settings.
2. Select Lock Lcd.
3. Then choose Screen lock.
4. Tap Password.
Enter at least four characters including numbers and symbols, and then enter the password again to verify it.
Setting a pattern:
1. On the Applications Lcd, tap Settings.
2. Select Lock Lcd.
3. Then choose Screen lock.
4. Tap Pattern.
Draw a pattern by connecting four dots or more, and then draw the pattern again to verify it. Set a backup unlock PIN to unlock the Lcd when you forget the pattern.
Setting a PIN:
1. On the Applications Lcd, tap Settings.
2. Select Lock Lcd.
3. Then choose Screen lock.
4. Tap PIN.
Enter at least four numbers, and then enter the password again to verify it.
Setting a password:
1. On the Applications Lcd, tap Settings.
2. Select Lock Lcd.
3. Then choose Screen lock.
4. Tap Password.
Enter at least four characters including numbers and symbols, and then enter the password again to verify it.
How to Upgrade With the Latest Software on Samsung Galaxy Fame
Keeping your device updated with the latest software fixes bugs on your handset thus contributing to its efficiency and life span. Samsung allows you to install those updates in two ways- through Samsung Kies or Over-the-Air. Well heres how you can install those latest software firmware using this two methods.
Upgrading with Samsung Kies
1. First launch Samsung Kies.
2. Then connect your phone to the computer using the USB cable that came with it.
3. Now Samsung Kies will automatically recognizes your device and a dialogue box
appears showing the available updates, if any.
4. Click the update button in the dialogue box to start upgrad ting to te latest software.
While youre upgrading the device, you shouldnt turn off the computer or disconnect
te USB cable and dont connect other media devices to the computer as it may interfere
the upgrading process.
Upgrading over-the-air
1. Go the Applications Lcd and then tap Settings.
2. Then go to About device.
3. Select Software Update then hit on Update.
How to Make Your Samsung Galaxy Fame a Portable Wi-Fi Hotspot
Smartphones these days can now share its mobile data connection and act as a portable Wi-Fi hotspot. And like those high-end gadgets, Samsung Galaxy Fame is sure to let you experience the benefits of making it as a portable Wi-Fi hotspot. Heres how you can make your Samsung phone the next Wi-Fi hotspot.
1. On your device, go to Settings Lcd first.
2. Then tap Wi-Fi and tap
 for more options.
3. Select Advanced options to customize your Wi-Fi settings.
4. Go to Tethering and portable hotspot.
5. And choose Portable Wi-Fi hotspot to share the devices mobile network connection.
And you now have a portable Wi-Fi hotspot using your Samsung Galaxy Fame.
Apps developers are remarkably making good money out of every apps they build. No wonder online stores are mostly visited by smartphone users just to check on the hottest new apps online. If youve found the perfect app for your Samsung Galaxy Grand, then follow these steps in installing and perhaps uninstalling those unwanted apps.
Installing apps
1. First tap on Play Store on the applications Lcd to view available apps online.
2. You can browse available apps by category or simply tap to search with a keyword.
3. Then select an application to view. To download it on your phone, tap Install. Make sure to double check the app info like its price and ratings before hitting the install button.
4. If theres a charge for that app,tap the price and follow the onLcd instructions to purchase it.
5. To install apps that are from other sources, just go to Applications > Settings > Security > Unknown sources.
Uninstalling apps
1. In uinstalling the apps purchased from the Play Store, tap
2. Then go to My Apps.
3. And select an application you want to delete, then tap Uninstall.
Installing apps
1. First tap on Play Store on the applications Lcd to view available apps online.
2. You can browse available apps by category or simply tap
to search with a keyword.3. Then select an application to view. To download it on your phone, tap Install. Make sure to double check the app info like its price and ratings before hitting the install button.
4. If theres a charge for that app,tap the price and follow the onLcd instructions to purchase it.
5. To install apps that are from other sources, just go to Applications > Settings > Security > Unknown sources.
Uninstalling apps
1. In uinstalling the apps purchased from the Play Store, tap
2. Then go to My Apps.
3. And select an application you want to delete, then tap Uninstall.
How to Change Font Size and Style on Samsung Galaxy Fame
Android phones running older version of OS can easily allow you to change its font size. However, changing its font style requires rooting of your device or installing 3rd party apps. Well the good news is, Samsung Galaxy Fame allows you to customize your phone’s font with just few taps. So if you think your Fame’s font is way too serious to fit your personality, then you can change into a more light-hearted one. Check out these steps on how to change Fame’s font size and style to suit your style.
To change the font size, follow these steps:
1. On your device, go to Settings menu by pulling down the Notification drawer.
2. Now you’re on the Settings menu, scroll down to Display and tap.
3. Under Font, tap on Font Size.
4. You’ll see five options (tiny, small, normal, large and huge) to choose from. Just choose from the list and you’ll immediately see the results within the Settings menu Lcd.
To change the font style, follow these steps:
1. Pull down the Notification drawer and tap on Settings icon.
2. Then scroll down to Display and tap.
3. Under Font section, tap on Font Style.
4. You’ll see four font style ( default font, Choco cooky, Helvetica S, Rosemary)
5. Choose the desired font style and tap on Yes to apply it. Take note that fonts on a web page will still be displayed as they always have.
6. Now if you wish to use other fonts, just tap on the tab Get fonts online at the bottom of the list for available font styles.
7. Once you tap that tab you’ll be redirected to Google Play Store where you can download additional fonts for Fame. Some are free and others cost on average of $0.99.
How to Activate NFC Feature
You can use this feature to make payments and buy tickets for transportation or events after downloading the required applications.
Note: If the Lcd is locked, your device will not read NFC tags or receive data.
How to Activate S Beam Feature
Use this feature if you want to send data like music, videos, images, and documents.
Warning: You should not send copyright-protected data via S Beam. Doing so may violate copyright
laws.
Android phones running older version of OS can easily allow you to change its font size. However, changing its font style requires rooting of your device or installing 3rd party apps. Well the good news is, Samsung Galaxy Fame allows you to customize your phone’s font with just few taps. So if you think your Fame’s font is way too serious to fit your personality, then you can change into a more light-hearted one. Check out these steps on how to change Fame’s font size and style to suit your style.
To change the font size, follow these steps:
1. On your device, go to Settings menu by pulling down the Notification drawer.
2. Now you’re on the Settings menu, scroll down to Display and tap.
3. Under Font, tap on Font Size.
4. You’ll see five options (tiny, small, normal, large and huge) to choose from. Just choose from the list and you’ll immediately see the results within the Settings menu Lcd.
To change the font style, follow these steps:
1. Pull down the Notification drawer and tap on Settings icon.
2. Then scroll down to Display and tap.
3. Under Font section, tap on Font Style.
4. You’ll see four font style ( default font, Choco cooky, Helvetica S, Rosemary)
5. Choose the desired font style and tap on Yes to apply it. Take note that fonts on a web page will still be displayed as they always have.
6. Now if you wish to use other fonts, just tap on the tab Get fonts online at the bottom of the list for available font styles.
7. Once you tap that tab you’ll be redirected to Google Play Store where you can download additional fonts for Fame. Some are free and others cost on average of $0.99.
How to Activate NFC Feature
You can use this feature to make payments and buy tickets for transportation or events after downloading the required applications.
Note: If the Lcd is locked, your device will not read NFC tags or receive data.
- On the Applications Lcd, tap Settings.
- Select More settings.
- And choose NFC.
- Drag the NFC switch to the right.
How to Activate S Beam Feature
Use this feature if you want to send data like music, videos, images, and documents.
Warning: You should not send copyright-protected data via S Beam. Doing so may violate copyright
laws.
- On the Applications Lcd, tap Settings.
- Select More settings.
- And choose S Beam.
- Drag the S Beam to the right.
Subscribe to:
Posts (Atom)