Saturday, November 22, 2014
How to play YouTube videos directly in VLC Media Player

In fact VLC Player can also play YouTube videos on your desktop without requiring the web browser or the Adobe Flash player and there are lots of benefits to watching YouTube videos in VLC.
The Benefits of Watching YouTube Videos with VLC
- First, You can skip any ads that might play before videos without needing to use a browser extension.
- Second, You can change the playback speed of videos, make it run slower or faster than the normal speed, which can help if youre trying to learn something new, like a dance.
- Third, You can watch the video in a smaller window while still doing other things on your computer. And finally, you can capture snapshots from the video easily through VLCs interface.
Follow the Tutorials to get started:
1. Launched the VLC player, press Ctrl+N to open the Network URL dialog.Or Click the Media menu in VLC, and then choose Open Network Stream.

2. Paste any YouTube video URL in the input box and click Play at the bottom!

Then, that’s all right. Now you can enjoy your favorite videos.Attention: In addition to YouTube, VLC Player can also play DailyMotion videos outside the browser.
Related article:
Tuesday, November 18, 2014
How to get the BeagleBone Black Drivers to work on Windows 8 computer
Heres a quick step-by-step guide:
1. Press win+c on the keyboard to bring up the charms side bar (or move mouse to right top corner of the screen)
2. Click the Settings button.
3. Click the Change PC Settings at the bottom of the sidebar.
4. On screen that shows up, select the General option from the sidebar then scroll down the page that appears.
5. Click the Restart now button under the Advanced startup section.
6. You will momentarily see the restarting screen, then it will switch to a blue screen titled "Choose an option"
7. Click the Troubleshoot button.
8. Click Advanced options.
9. Click Startup Settings
10. Click Restart
11. You should then see a Startup Settings screen after your computer reboots.
12. Press 7 or F7 on your keyboard to Disable driver signature enforcement
13. Now Windows 8 will continue starting up.
14. For Windows 8 64-bin: Log-in as normal, and then run BONE_D64.exe again (Click on Link to download)
15. For Windows 8 32-bin: Log-in as normal, and then run BONE_DRV.exe again (Click on Link to download)
16. Now you should see 4 warning dialogs about "unsigned driver installation", click OK for all of them.
Monday, November 17, 2014
How to choose the best for your home theater system
Friday, November 14, 2014
How to Customize YouTube channel
Tuesday, November 11, 2014
How to Install a Wireless Network
As more and more people move on from Dial up to broadband and connection to the information super highway there are new things like routers, modems that need to be setup in order to get online and start browsing. This guide is very basic and not too technical and hopefully it is helpful to those with little to no background in setting up wireless networks.
Cable companies tend to not give cable modems with wireless built in. Therefore you have to go find a good wireless router that works well. But which one?
I personally use the Linksys 2.4 Ghz wireless G router. This router gets approximately 54 Mbits/Second. This varies depending on the type of router you get. B is one of the first wireless types to come out. They get approximately 11 MBits/second, Wireless G gets approximately 54 Mbits/second and Wireless N gets approximately 74 MBits/second. The range of your wireless network also depends on the type of router you decide to get. I would recommend getting a Wireless G for an apartment and a wireless N for a huge mansion.
After you bring your router home, installation is pretty straight forward for the most part, follow the steps below for easy installation:
- Plug your wireless router as close as possible to your DSL or Cable modem.
- Your Wireless modem should be accompanied with a RJ45 cable, plug in one of the cable to a port in back of DSL modem and port most likely labeled "Internet" or "Uplink" of your Wireless router.
- Now both are connected, however setup is not complete. You will need another RJ45 cable connect it from any open port from back of your wireless router to the your laptop or desktop. The port should light up in front of your wireless router to indicate that a device is connected directly to your router.
- Depending on the device you get, you will need to go to one of the following IP addresses in order to setup security and configure your wireless network so that it is not used for free by your neighbors. Http://192.168.0.1 or http://192.168.1.1 Here you will be required to first setup a user name and password to enter the settings. Please note it down so you do not forget in case you need ever need to come back. We are not done just yet, this does not secure your wireless network from your free loading neighbors.
- Go to the wireless tab and setup your SSID it will need to be set to broadcast so when you have multiple devices that need to connect. Name it something simple and easy for you remember.
- Enter encryption code, this is very important, this will be the password you will need to know whenever you decide to connect a new device to your wireless network. Only devices that have the WEP key entered correctly will be able to connect to your network and use it to connect to the Internet. I would recommend using WPA Personal as your WEP Security Mode.
- Once you have your wireless device connected to your network you should be able to connect using wireless and will not be need to be stationary or confined to just one room of your apartment or home. If you have any questions about this hub feel free to contact me. I hope this hub was helpful to you.
Sunday, November 2, 2014
How To Manage Lock Screen In Windows 8
Basic Lock screen contains the following information:
- Lock Screen Background Image.
- Today’s Date with time.
- Current status of available network and Battery status.
- Press Window + R key, this key combination will initiate/opens a new window on your monitor screen. This is known as RUN window.
- Then type “gpedit.msc” in the text box and press Enter key, this command will open “Group Policy editor” window.
- On the left panel of Window click on computer configuration, click on Administrative templates, and then click on Control panel. Now lists of option appears on left panel of screen, out of them click on Personalization.
- Then in the right pane of window you will get option to change configure the lock screen and Start menu.
- You can enable/disable lock screen through these option, change Lock screen image and Start menu background.
- Press Window + R key, this key combination will initiate/opens a new window on your monitor screen. This is known as RUN window.
- Then type “regedit” in the text box and press Enter key, this command will opens Registry Editor.
- A new window appears on your screen which contains list of registries files. You have to find the following registry:
- If you are not able to find create a new registry file DWORD NoLockScreen and set its value to 1 to disable it or set its value to 0 if you want to disable it.
- Then Restart your computer to make changes to take affect.
- Thats It!
Monday, October 13, 2014
How to Activate Camera App and Play Tracks on a Lockscreen on Sony Xperia Z2 Tablet
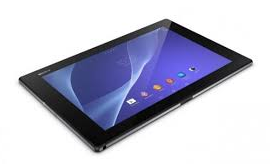 LockLcds dont normally allow users to launch any apps or even take photos. We still need to unlock our Lcds to use certain apps on our handset. But with Sony Xperia Z2 Tablet, you can take photos, record videos and play tracks without unlocking the Lcd. Heres how you can enjoy this feature on your Sony Xperia Z2 Tablet.
To take a photo on a lockLcd
1. Activate first your Lcd by briefly pressing the power key

2. Now activ the camera app
 by dragging the camera icon to the left across the Lcd.
3. And tap
 to take photos or record videos without unlocking your Lcd.
To play an audio on a lockLcd
1. Activate first your Lcd by briefly pressing the power key
.2. Now to display the music player controls, drag
 to the right across the Lcd.
3. And tap
 to play a track on a lockLcd.
To pause an audio track from the lockLcd
1. Activate first your Lcd by briefly pressing the power key
.2. When the music player controls appear, tap
 to pause the track.
To change the currently playing audio track on a lockLcd
1. Activate first your Lcd by briefly pressing the power key
.2. Then tap
 or
or when the music player controls appear.
Sunday, October 12, 2014
How to Add and Resize Widgets on Sony Xperia Z2 Tablet
Adding Widgets on your HomeLcd will help you improve your productivity in using your Sony Xperia Z2 Tablet. If you dont know what widgets means, Widgets are small applications that you can directly use on your HomeLcd. These will serve as your shortcut icon so will no longer need to access your Menu.Follow these steps on how to add widgets on your HomeLcd.
- Tap and hold an empty area on your Home Lcd until your device vibrates.
- There should an option appear, tap on Widgets.
- Select the widget and tap on it you want to add.
- There are some widgets that are resizeable, you can expand them to view the content more on your HomeLcd.
How to resize a Widget:
- Tap and hold the widget you want to resize until it magnifies and the device vibrates. You can tell if the widget is resizeable if the highlighted frame and resizing dots appear.
- You just need to Drag the dots for your preferred size.
- Then tap anywhere on the HomeLcd to confirm the new size of the widget.
Friday, October 10, 2014
How to Factory Reset Sony Xperia Z2 Tablet
We have our own reasons why we factory reset our device. Maybe we want to delete all the files and restore the device to its original state. It could also be the device may be malfunctioning or so slow and it needs to be reset.Restoring the default settings or factory reset your Sony Xperia Z2 tablet will delete all your files. It is recommended to backup your important files on your computer before attempting to reset your device.
There are two ways on how to reset your Sony Xperia Z2 tablet. One is to erase everything, wiping your files and restoring the default settings. The other one is to reset the device without deleting your personal data.
How To Reset Your Sony Xperia Z2 (Erasing All Your Files):
- On your Home Lcd, tap Apps icon.
- Go to Settings, and select Backup & reset.
- Tap on Factory data reset.
- Then Reset tablet.
- Confirm by tapping Erase everything. You just need to wait while your phone deleting your files and restoring your settings to default.
How To Reset Without Erasing Your Personal Data:
- On your Home Lcd, tap Apps icon.
- Go to Settings, and select Backup & reset.
- Tap on Settings reset.
- Then Reset tablet.
- Confirm by tapping Reset settings.
- Wait while your phone restoring your settings.
Warning: To avoid permanent damage to your device, do not restart your device while a reset procedure is underway.
Thursday, October 9, 2014
How to Extend Battery Life of Huawei Ascend G615

• Lessen the Lcd brightness and the Lcd lock timeout.
• Turn down your device volume with the volume keys.
• Close any apps or features when you are done using it so they will not continuously running in the background.
• Turn off the network connection if you are out of range so that your device will stop searching for a network signal.
• You should use the latest version of the software update. Software updates improves some features and fixes some bugs on the previous software version.
• Turn off the camera flash.
• The camera viewfinder can be a power drain, so after youve finished taking photos.
Wednesday, October 8, 2014
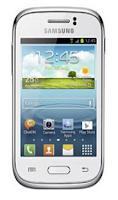
How to Upgrade With the Latest Software on Samsung Galaxy Young
Upgrading with Samsung Kies
1. First launch Samsung Kies.
2. Then connect your phone to the computer using the USB cable that came with it.
3. Now Samsung Kies will automatically recognizes your device and a dialogue box
appears showing the available updates, if any.
4. Click the update button in the dialogue box to start upgrad ting to te latest software.
While youre upgrading the device, you shouldnt turn off the computer or disconnect
te USB cable and dont connect other media devices to the computer as it may interfere
the upgrading process.
Upgrading over-the-air
1. Go the Applications Lcd and then tap Settings.
2. Then go to About device.
3. Select Software Update then hit on Update.
Sunday, October 5, 2014
HTC Desire 501 Tips and Tricks How To
 It is very important if you know some tips on your device like HTC Desire 501. It will help you learn more about your device to make your life much easier in using it. Improving your productivity and fulfilling what you expected on your HTC Desire 501.
Here are some How Tos for your HTC Desire 501. These How Tos may still not yet complete and I am finding some time to work on the others:
How to Factory Reset (Hard Reset) HTC Desire 501
Resetting your HTC Desire 501 will restore the default settings of your device. It will also delete all your files on your phone, so it is recommended to have a backup of your important files on your computer. There are two ways on how to reset your HTC Desire 501. It can be done through the settings or through the hardware buttons.
Resetting HTC Desire 501 on Settings:
- Slide the Notifications panel open, and then tap the Gear Icon or Settings.
- Select Backup & reset.
- Tap Reset phone.
- If you want to delete all your files, then tap Erase all data.
- Then tap OK to confirm.
These steps is also helpful when your HTC Desire 501 is unresponsive or frozen and theres no way to access the settings.
- First, press and hold the Volume Down button, and then do the same way on the Power button.
- Hold the two buttons until the three Android images appear on the Lcd.
- Release the button when the three Android images appear and press Volume Down.
- Tap on Factory Reset, and then press the Power Button to confirm.
Contacts is very important for everyone of us. We cant connect to our friends without a contact number. If you have a new phone, saving contacts on the phone one by one is so hassle. But now, theres an easy way how to transfer or import your contacts from your old phone to your new phone.
Use your PC to transfer contacts to your new phone. This process is applicable in several phone brands, including iPhone, Samsung, HTC and Nokia.
You just need an Internet Connection on your PC, your old and new phone and their own USB cable.
Installing the PC Companion:
- Turn on your new Phone and connect it to your PC.
- On your new Phone, tap "Install" to install PC Companion on the PC.
- On your computer, if a pop-up window that appears notifies you about available PC Software, select Run Startme.exe.
- Then click Install to start the installation and then follow the instructions to complete the installation.
If you are not prompted with a pop-up window to install the PC Companion, you can also download the PC Companion here.
- Make sure that PC Companion is installed on your PC.
- Open the PC Companion application on your PC.
- Then click Contacts Setup and follow the instructions to transfer your contacts.
How to Send a Multimedia Message and Create a Slideshow on HTC Desire 501
Text messaging has grown its popularity over the years especially to younger generations. People, especially teens, prefer to communicate with friends and relatives thru texting instead of the traditional call. But whether your reaching out to friends thru text or a call, what matters most is the effort for still trying to keep in touch despite distance and even on busy schedules. We should be more grateful these days as it only takes minutes, even seconds, for a quick response unlike the old school snail mail. Now, everyone is just a text away. And more to that, you can even send multimedia messages (MMS) especially on special occasions to add more touch to a simple text-filled Lcd. Heres how you can send a MMS on HTC Desire 501.
1. On your devices homeLcd, tap on
 and go to Messages.
2. Then tap on

3. On the To Field, key in a contact name, mobile number or email address. You can also send it to a group of friends by tapping on

4. To add a subject line, tap on
 and go to Add Subject.
5. Tap on the box that says Add text and there you can type in your special message.
6. Choose an attachment for your message by tapping on

7. After you browse and select an attachment, tap on Send or press
 to save it as a draft. You can also tap on
 to see options like replacing, viewing and removing your attachment.
Now if you wish your Mutimedia Message to reach an extra mile, you can have it on a slideshow format. Heres how you can create one:
once again and select Slide.2. Then choose where you want to insert the next slide.
3. When youre done adding the next slide, you can either do the following:
- tap onand choose to add a video or a photo
- tap onand then audio if you want to add a voice recording or a music to the slide
- tap on Add Text to add a caption
- tap onto view options like replacing, viewing or removing your attachment.
select Preview. If you dont see Preview, scroll down the menu. To view the playback controls, tap once the preview Lcd. or tap on Send to save message as a draft.How to Set HTC Desire 501 into Sleep Mode
1. Briefly press on your devices Power button to turn off the display. Then switch to Sleep Mode.
2. To change the time before your device sleeps, just go to Display & buttons settings.
3. To wake it up, manually press the Power button and unlock your Lcd.
4. Your device will also automatically wakes up when you have an incoming call.
How to Extend Battery Life of HTC Desire 501
 .
.How to Check Battery Usage and History on HTC Desire 501

1. On your homeLcd, slide the Notifications panel open.
.How to Clear Call History on HTC Desire 501
then go to Remove call history.How to Hide Missed Calls and Messages on HTC Desire 501 LockLcd
 .
.How to Personalize HTC Desire 501 Launch Bar
to go to the All apps view.How to Set up Speed Dialing on HTC Desire 501
and go to Speed Dial.and select a contact from the list.How to Make Your HTC Desire 501 a Wireless Router
- Slide the Notifications panel open, and then tap the Gear Icon or Settings.
- Under Wireless & Network, tap More.
- Select Mobile network sharing > Portable Wi-Fi hotspot settings.
- Enter your preferred router name, or you can also use the default name.
- Choose the type of security and set a password for your wireless router. (If you selected none, then you dont have to enter a password.)
- Select the Portable Wi-Fi Hotspot option to turn on the wireless router.
Copying Files to or from HTC Desire 501
You can copy your music, photos, and other files to HTC Desire 501.
1. Connect HTC Desire 501 to the computer using the supplied USB cable. Youll see options for viewing or importing files on the computer Lcd.
2. Choose to view files.
3. Copy the files from your computer to HTC Desire 501, or vice versa.
4. After copying the files, disconnect HTC Desire 501 from the computer.
Saturday, October 4, 2014
How to Add a Geotag on a Photo on Sony Xperia Z2 Tablet
Adding a location to those photos somehow adds relevance and it gives you that flashback of memories when you view those nicely captured moments. Well, this feature is not new any longer since its been there online and you often use them on photo-filtered websites. But with Sony Xperia Z2 Tablet, you can now add geotags on your photos right on your handset. Heres how you can add geotag on your photos.1. Open your photo gallery on your device.
2. When youre viewing a photo, just tap the Lcd and the toolbars will display.
3. Now tap
 to open the map Lcd.
4. Find and tap the desired location to put the map on the photo.
5. To adjust the location of the photo, just tap the location on the map to where you want to move the photo.
6. Tap OK when youre done and to save the geotag. You can then return to the photo viewer Lcd.
Friday, October 3, 2014
How to Start a Conference Call on Sony Xperia E

 .
.2. Then dial the number of the second participant and tap
 .
.3. When the second participant answers the call, the first call is put on hold.
4. Tap on
 to start the conference call. Repeat the same steps to add more participants to the conference call.
To have a private conversation with one of the participants
1. Tap the button showing the number of participants during the ongoing conference call.
2. Then tap on the name of the participant you wish to talk privately.
3. To end the conversation and return to the conference call, tap
To release a participant during the ongoing conference call
1. Tap the button showing the number of participants during the ongoing conference call.
 next to the participant you want to release from the call.
To end the conference call
1. During the conference call, just tap
.